Dealing with the
intermittent BLUE screen appearance on my back-up camera. I suspect a loose connection (at best) or worse case, a short somewhere in a connector.
 Removing the camera
Inner trunk lid exposed after removing the lid liner.

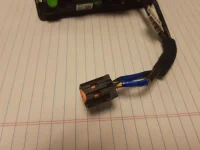
Lying on your back against the car and looking upwards, you can follow the taped wire leads to the connector junction where two wires then extend to the camera body—one into another connector and the other into the back of the camera body.
In order to remove the camera from the lid, first unplug the camera unit by depressing the black tab on the connection junction (upper right in photo below) and gently pull the connector apart.
To remove the main camera unit requires some patience and dexterity.
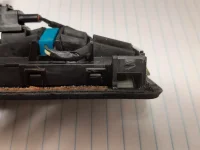
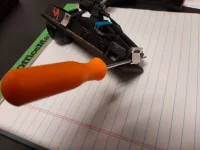
The camera unit is held in place by six metal tension clips that must be depressed in order for the unit to removed (pushed outwards from the trunk lid). On the exterior face of the camera is a pliable rubber cover. I found it easiest to use plastic pry tools (no metal!) to work under the rubber lip and begin to lift the camera body out from the trunk lid. I am using my other hand to squeeze (depress) 2 to 3 of the 6 metal tension clips on the inside directly opposite where I am lifting with the pry tool. This is where patience is essential as it takes time to squeeze the clips adequately so they slip under the edge of the trunk cutout all the while you are prying on the exterior. (FYI: Sore fingers will result). Once one end of the unit is loose, the remainder goes considerably easier.


upon removal and inspection of the camera unit, I found no loose connections or evidence of water intrusion, nor damage. All harnesses felt snug. I did give the unit a thorough cleaning.
I re-attached the unit to the power (camera was still free from the trunk lid), started the car and put it in reverse.
BLUE Screen.
Unplugged unit. Re-plugged.
BLUE screen
Unplugged unit. Started car. Put in reverse. No camera.
BLUE screen.
Reinserted camera back in to trunk lid. Plugged in. Started Car. Put in Reverse.
BLUE screen.
Closed trunk. Started car. Put in Reverse.
Camera works!
All the next day...backup camera works!
Day after, put the car in reverse...
BLUE screen again.....


")