umakegoodcookies
Registered Member
- Joined
- May 31, 2020
- Messages
- 35
- Reaction score
- 9
- Points
- 8
- Genesis Model Type
- 2G Genesis Sedan (2015-2016)
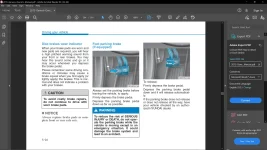
I just did my parking brake and I thought I'd share a few details. First, make sure someone hasn't tightened the cable at the brake pedal too much. This is a little bit tedious if it is too tight. You check by moving the pedal and feeling for a sudden change in resistance. If there isn't any then the brake either does not engage at all or the cable is too tight. Push the pedal down and you can see a 10 mm nut on the end of a cable. If it seems wound down the cable quite a bit then it is probably the latter problem and you need to loosen it until you can feel a difference between free play and pulling on the brake. If it was the other problem, not engaging at all, that's a different post. 
Chock your front wheels front and back and take normal precautions jacking and removing a rear wheel. You only need to do one side at a time so there's not really a need for extra safety other than making sure the car doesn't roll because you need the car in neutral for this. Once your wheel is off you can look for the adjuster hole. It's in the beveled edge of the rotor as you move away from the studs. If there's no hole there must be a rubber plug covering it. Take a screwdriver and take action to turn it into a hole. Now you can see into the emergency brake area, which is just a mechanical drum brake. Rotate the hole so that it is toward the back of the car. If you were looking at the left wheel it's about 2:45 on the clock and on the right wheel about 9:15. Now you should be able to see the adjuster. If you can't just rotate it a bit. A flashlight helps at this point. Take a flat screwdriver and rotate that until the wheel does not move. The tightening direction is for the tip of the screwdriver to be moving out toward the edge of the wheel and the handle of the screwdriver to be moving inward. Do that until you can't turn the wheel anymore and then backoff by turn it a bit in the other direction.
Repeat that for the other side.
Tighten the brake pedal until there's just a little bit of freeplay.
Enjoy the barely working parking brake (which was better than the not at all working parking brake I had before). ??


