• Car enthusiast? Join us on Cars Connected! iOS | Android | Desktop
  • Hint: Use a descriptive title for your new message
    If you're looking for help and want to draw people in who can assist you, use a descriptive subject title when posting your message. In other words, "I need help with my car" could be about anything and can easily be overlooked by people who can help. However, "I need help with my transmission" will draw interest from people who can help with a transmission specific issue. Be as descriptive as you can. Please also post in the appropriate forum. The "Lounge" is for introducing yourself. If you need help with your G70, please post in the G70 section - and so on... This message can be closed by clicking the X in the top right corner.

ADRO V2 Spoiler

Phastroh

Registered Member
Joined
Feb 20, 2020
Messages
329
Reaction score
124
Points
43
Genesis Model Type
Genesis G70
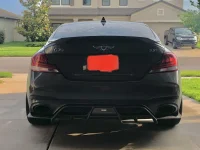
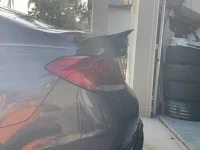
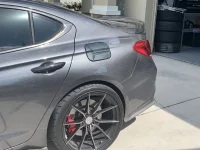
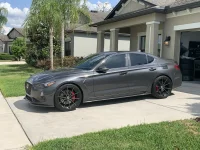
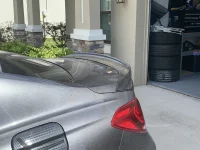
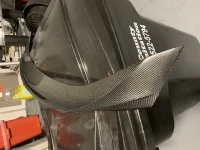
So it finally arrived. The last piece to complete my full ASRO kit.

V3 Sides and rear diffuser
V2 Front lip and Spoiler

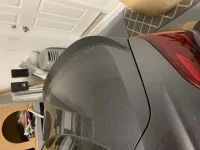
Just snapped these turd photos for now and the one I’m replacing. The old one was popular but was gone fast off EBay. Had tons ask how to get it but never saw one like it again.

I’ll update after install however I’m waiting on my Reflective Red badges and replacement side vents.
 

Attachments

  • 01479EFD-45E0-4324-9248-9DA6982F2D49.webp
    01479EFD-45E0-4324-9248-9DA6982F2D49.webp
    122.1 KB · Views: 51
  • 15833760-1CE8-451F-B516-F057B2A4613C.webp
    15833760-1CE8-451F-B516-F057B2A4613C.webp
    217.6 KB · Views: 51
Last edited:
I love it 100000%

The 3 year old Chinese one still looks like new that I took off and is still my second favorite style and I still cannot find one that looks like it.
 

Attachments

  • D81952CD-39AC-4302-8C62-E05AE733408A.webp
    D81952CD-39AC-4302-8C62-E05AE733408A.webp
    168.6 KB · Views: 68
  • D68FC60D-DDE8-457F-AC45-6B5673BA85E8.webp
    D68FC60D-DDE8-457F-AC45-6B5673BA85E8.webp
    144.5 KB · Views: 67
  • 570E7AE4-34E2-483F-B89F-7794FB246297.webp
    570E7AE4-34E2-483F-B89F-7794FB246297.webp
    278 KB · Views: 66
  • 837B4F81-B1EF-4D9D-A001-FBCC766ECCFA.webp
    837B4F81-B1EF-4D9D-A001-FBCC766ECCFA.webp
    383.9 KB · Views: 67
  • 605B1070-15A3-4CC4-83F4-228D169F4672.webp
    605B1070-15A3-4CC4-83F4-228D169F4672.webp
    371.5 KB · Views: 71
Can you tell me what you did for your chrome exhaust port surrounds? Did you remove them or paint them? I am considering same.
 
Looking to update and upgrade your Genesis luxury sport automobile? Look no further than right here in our own forum store - where orders are shipped immediately!
Can you tell me what you did for your chrome exhaust port surrounds? Did you remove them or paint them? I am considering same.
I removed them. Then bought a can of Raptor Flat Black enamel. I swear I used the wheel paint but when I went back last week to get it for my front grill the guy said they have had only the enamel since months prior to my purchase.

So I removed them, washed them good and put probably 10 coats on them lol I used the whole can over 2 days and I sprayed all sides and inside the tips as well.

I wanted nothing to show from any angle.

My only work of caution is due to no room as you will see when you take them out, I wrapped mine in paper during reinstall to make sure the paint was not scratched.

My previous attempt with a more rubberized paint ended in scrapes and I realized it was the wrong paint anyway.

So just wrap it up and once it is in place you can easily take the paper off.

Better safe than sorry and having to unbolt anything.

Just let it dry a few days and lots of coats. I didn’t care they were missing a few days.

That same paint is on my grill and it looks great and lots of compliments. Looks great.
Thanks. So they just pull straight outward after removing a couple screws?
 
Thanks. So they just pull straight outward after removing a couple screws?
No. That’s why you should be wrapping them up.

It’s a bit of turning and pulling lol it’s not that smooth and can easily scrape.

I will only say the drivers side went back in smoothly but the passenger side not and it’s basically the same thing.

Those rings are just part of a bigger piece so it’s not simple. I wantbto say I had to take the rubber thing of the hanger too.

It’s just a pain if you are trying not to scrape them but in general it’s not that hard to remove and put back.

Oh I think one of the screws you will need a stubby for due to no room.
 
Back
Top