Ell Y
Registered Member
- Joined
- May 9, 2018
- Messages
- 39
- Reaction score
- 18
- Points
- 8
- Location
- NYC Boroughs
- Genesis Model Type
- 2G Genesis Sedan (2015-2016)
Hey everybody! Figured I'd do a little write up of the build I used to install OEM Fog lights that i bought off ebay. I opted not to get the OEM stalk functionality as cost was prohibitive to me, and decided to use a simple toggle switch. I want to thank all the others before me who did this mod, and are scattered around the forums: Diamondmit, LarryJM, CarlitoGTR, LouKango, etc. And Losboricua's extremely helpful written tutorial at this link: Tutorial link
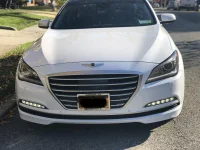
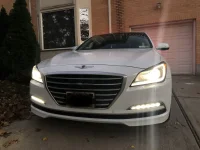
Looks very nice, and now I can finally leave the ugly yellow DRL set to off. This also improves the life of the turn signal/yellow DRL bulbs as well as the HID lamps, as I pass through a lot of tunnels on my commutes and the lights flicker on and off, which is bad for the longevity of the ballasts and bulbs.
As a preface, I have very limited experience working on cars, and even less so with electrical mods, but I found this install to be fairly easy. Took me less than four hours , and that includes the one hour I spent trying to fish a wire through the firewall grommet.
1) You'll want to get an OEM fog light set that includes the wiring harness to the fog light like so: eBay link
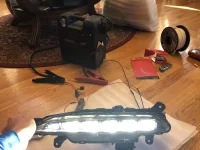
2) Determine the polarity of the two LED lamps and mark which wire is positive or negative. This is important, because if you connect them backwards, your lamps will not turn on and you will be stuck chasing miswiring late into the install. There are a number of ways you can do this, but I used a 12V car battery charger as shown. Later, you will splice the positives and the negative (ground) wires of both lamps together so that there is only one set of wires going from the driver side into your switch in the cabin.
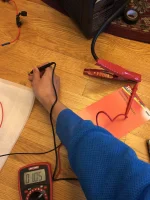
***Side Note: In another thread, it was posted that these lamps draw 1.8 amps, but my old craftsman meter tested a draw of 1.06-1.08, which would make each one just about 13 watts. I am quite new to multimeters and electricity though, so maybe I did this test wrong.
***
3) Jack up your car on the front, or use rhino ramps like I did. Open the hood- It'll make seeing where you're going underneath so much easier.

4) Remove the plastic fasteners on the front underbody panel using a small screwdriver or tab removal tool.
5) Use a 10 mm socket wrench to remove the 4-5 10 mm bolts. At this point, the front underbody panel should slide out easily and give you access to the fog lights.
6) Use a 8 mm socket to remove the old fog light covers on the car. There should be five bolts per side. Pop out the blanks from the front or wiggle them loose.
7) Install the new fog lights - it'll get a little tight here, so you'll need to consult the old blank for the bolt placement. Put a little tape on your fingers for the hard to reach ones on the top, and fasten the bolts to it so you can get them back in place. Tighten.
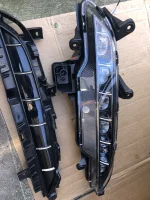
8) Extend the factory harness wires coming out of the passenger fog light with wire of your own choosing. I believe the harness came with 14 AWG wire, but I dropped down to a 2 conductor 16 AWG. Splice, and crimp. I used heat shrink tubing and a plastic wire loom/conduit over that to help protect from the elements., even though the wire I chose for this build was jacketed: Link to wire
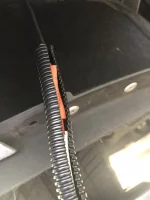
9) Run the wiring to the driver side fog lights. Find a place to zip tie every foot and a half so that the wires don't vibrate too much. Splice the positives and grounds together so that you will only have two wires to deal with thereafter. Protect with electrical tape, heat shrink, or whatever you'd like. I used a lot of silicone self fusing tape.
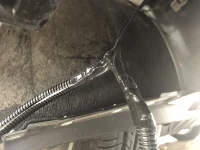
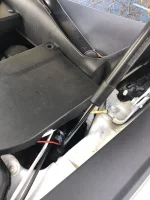
10) Run the positive wire from the driver fog up to firewall and into cabin. The firewall access point is located from the hood release lever. From inside the cabin, trace the hood release cable from the lever to a little rubber grommet as shown by the lit portion of the top left of image here:
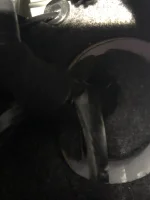
I used like an old metal wire/clothing hanger to fish the wire through:
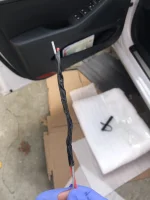
11) Attach positive wire that you ran from the engine bay to your switch.
12) Attach micro2 tap-a-fuse with a 5 or 10 amp fuse to a fuse of your choosing inside the fuse box, to the left of the steering wheel. Try to find one that is only on when the car is on, like the two 20A cigarette lighter outlets. Otherwise, if you forget to manually switch off, the lamps will drain your battery even when the car is off and doors locked.
*Be sure to orient the fuse tap correctly. There are youtube videos that show you how this is done, but basically you just test the circuit with only the accessory fuse inserted and if it turns on, then you're golden.*
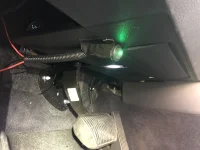
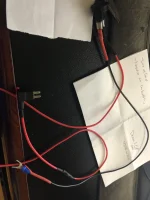
12) Hook up to the switch of your choosing. My switch had an on/off light built in, so for that to work, I had to run a ground wire to the chassis for the switch. Here's a pic of my switch with two of the wires connected

Looks very nice, and now I can finally leave the ugly yellow DRL set to off. This also improves the life of the turn signal/yellow DRL bulbs as well as the HID lamps, as I pass through a lot of tunnels on my commutes and the lights flicker on and off, which is bad for the longevity of the ballasts and bulbs.
As a preface, I have very limited experience working on cars, and even less so with electrical mods, but I found this install to be fairly easy. Took me less than four hours , and that includes the one hour I spent trying to fish a wire through the firewall grommet.
1) You'll want to get an OEM fog light set that includes the wiring harness to the fog light like so: eBay link
2) Determine the polarity of the two LED lamps and mark which wire is positive or negative. This is important, because if you connect them backwards, your lamps will not turn on and you will be stuck chasing miswiring late into the install. There are a number of ways you can do this, but I used a 12V car battery charger as shown. Later, you will splice the positives and the negative (ground) wires of both lamps together so that there is only one set of wires going from the driver side into your switch in the cabin.

***Side Note: In another thread, it was posted that these lamps draw 1.8 amps, but my old craftsman meter tested a draw of 1.06-1.08, which would make each one just about 13 watts. I am quite new to multimeters and electricity though, so maybe I did this test wrong.

***
3) Jack up your car on the front, or use rhino ramps like I did. Open the hood- It'll make seeing where you're going underneath so much easier.

4) Remove the plastic fasteners on the front underbody panel using a small screwdriver or tab removal tool.
5) Use a 10 mm socket wrench to remove the 4-5 10 mm bolts. At this point, the front underbody panel should slide out easily and give you access to the fog lights.
6) Use a 8 mm socket to remove the old fog light covers on the car. There should be five bolts per side. Pop out the blanks from the front or wiggle them loose.
7) Install the new fog lights - it'll get a little tight here, so you'll need to consult the old blank for the bolt placement. Put a little tape on your fingers for the hard to reach ones on the top, and fasten the bolts to it so you can get them back in place. Tighten.

8) Extend the factory harness wires coming out of the passenger fog light with wire of your own choosing. I believe the harness came with 14 AWG wire, but I dropped down to a 2 conductor 16 AWG. Splice, and crimp. I used heat shrink tubing and a plastic wire loom/conduit over that to help protect from the elements., even though the wire I chose for this build was jacketed: Link to wire

9) Run the wiring to the driver side fog lights. Find a place to zip tie every foot and a half so that the wires don't vibrate too much. Splice the positives and grounds together so that you will only have two wires to deal with thereafter. Protect with electrical tape, heat shrink, or whatever you'd like. I used a lot of silicone self fusing tape.

10) Run the positive wire from the driver fog up to firewall and into cabin. The firewall access point is located from the hood release lever. From inside the cabin, trace the hood release cable from the lever to a little rubber grommet as shown by the lit portion of the top left of image here:

I used like an old metal wire/clothing hanger to fish the wire through:

11) Attach positive wire that you ran from the engine bay to your switch.
12) Attach micro2 tap-a-fuse with a 5 or 10 amp fuse to a fuse of your choosing inside the fuse box, to the left of the steering wheel. Try to find one that is only on when the car is on, like the two 20A cigarette lighter outlets. Otherwise, if you forget to manually switch off, the lamps will drain your battery even when the car is off and doors locked.
*Be sure to orient the fuse tap correctly. There are youtube videos that show you how this is done, but basically you just test the circuit with only the accessory fuse inserted and if it turns on, then you're golden.*
12) Hook up to the switch of your choosing. My switch had an on/off light built in, so for that to work, I had to run a ground wire to the chassis for the switch. Here's a pic of my switch with two of the wires connected

Last edited:


