• Car enthusiast? Join us on Cars Connected! iOS | Android | Desktop
  • Hint: Use a descriptive title for your new message
    If you're looking for help and want to draw people in who can assist you, use a descriptive subject title when posting your message. In other words, "I need help with my car" could be about anything and can easily be overlooked by people who can help. However, "I need help with my transmission" will draw interest from people who can help with a transmission specific issue. Be as descriptive as you can. Please also post in the appropriate forum. The "Lounge" is for introducing yourself. If you need help with your G70, please post in the G70 section - and so on... This message can be closed by clicking the X in the top right corner.

Headlight scratch repair

Billfz1

Registered Member
Joined
Nov 28, 2012
Messages
142
Reaction score
1
Points
16
Hi Group,
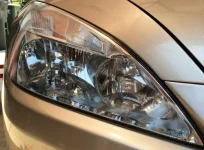
I collected some parking lot rash yesterday. This despite hiking in from the next county. Looks like the guy got one of my headlights with the end of his door. A small scratch, but aggravating. the scratch is about 1/2 inch long on the side of the light, pretty deep though. Has anyone here repaired these type of scratches? Would likely do it myself but need tools or other means to do the fix.
Suggestions are welcome.
Bill
 
Looking to update and upgrade your Genesis luxury sport automobile? Look no further than right here in our own forum store - where orders are shipped immediately!
How deep is the scratch? Please post pics. My previous car was a 2004 Honda Accord Sedan and the lights came out great. I attached a pic for reference. It took maybe 15 minutes per lens with a DA. Absolutely saved my lights. They were cloudy and pretty scratched up. Here are the items and steps I followed to get them cleaned up.

You'll need a few things to pull this off:
  1. Glass Cleaner (I like Stoner Invisible Glass - No ammonia)
  2. Mirofiber towels
  3. Wet/Dry Sand paper (grit level dependent on scratch depth - lower grit for deeper scratch)
    • 1200,1500,2000 - for minor to light
    • 800,1000,1200 - for medium to minor
  4. A Bucket of water
  5. Automotive grade masking tape
  6. Optical Grade Polish (I like Chemical Guys V32, V34, V36, & V38)
  7. A Dual Action (DA) Polisher, if you have one - Optional
    • Polishing pads if using a DA

Depending on depth you can do the following steps to minimize or completely repair the scratch:
  1. Soak your Wet/Dry sand paper for at least 1 hour prior to use
  2. Clean the lens thoroughly (Stoner Invisible Glass)
  3. Use masking tape to mask the area around the light so you don't add paint scratches to your to-do list
  4. Wet sand the lens (by hand or use a DA)
    • Start with lowest grit paper and work your way to higher grit to polish out the lower grit scratches
    • Rinse often & keep the paper and lens wet
    • It will look worse before it looks better
    • When you can't feel the imperfections with your hand - stop and do final rinse
  5. Polish the glass (Optical grade polish)
    • Apply polish by hand or with DA pad
    • Work your way from lowest to highest grade polish (using a high grade early just makes the work harder)
    • Lens will start to shine
  6. Seal the glass with a sealant (I like JetSeal 109)

I hope this helps...
 

Attachments

  • IMG_1018.webp
    IMG_1018.webp
    66.2 KB · Views: 113
Thanks for the Info. I will post picures tomorrow. Sometimes I feel like I have gone overboard about this car. But I haven't had something this nice in a long time and want to keep it that way.
 
Back
Top