Dudeman
New member
- Joined
- Sep 15, 2022
- Messages
- 17
- Reaction score
- 1
- Points
- 3
- Genesis Model Year
- 2015
- Genesis Model Type
- 2G Genesis Sedan (2015-2016)
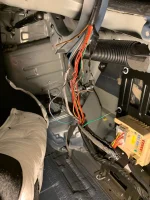
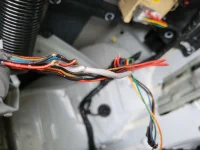
Sorry to repost but I am a little desperate here. I am suffering the same issue that everyone else is regarding the tech service bulletin TSB #20-BE-007H I have tried fix mine and there are 3 black wires that were all severed and they are the same color- all black and they are all cut. So, I am not sure what to connect these to, meaning 3 black wires need to go to 3 black wires. How do I know which ones to are the correct matches? Why these are not different colors I will never know. Anyone have any idea what to do here? And after all of this, it did not fix the problem and now i have no brake lights when I press my brakes. running lights work, no brakes. Nothing else is working (Camera, back up light etc). its like I made it worse. So very pissed at Hyundai, this should be a recall not a TSB. For your amusement, here is what I found when I pulled away my conduit. Any help is greatly appreciated! Absolutely amazing Hyundai....