Hargarbl
Hasn't posted much yet...
So I had to change out my mirror gear and figured I would do a write up on it since it seems to be a fairly common issue as these cars age. This is for those experiencing the clicking when trying to fold/unfold power mirrors. I tried my best to get as many pictures as possible, admittedly I did miss a couple but this should help for the most part. Enjoy the windows paint art.
Thanks to @BarryG for the original post that helped me find the gear and to @badmrscary for the instruction on how to pop the glass off
Part off amazon:
Amazon.com: Bross BGE552 Side Mirror Repair Gear for Hyundai I30 Chevrolet Captiva: Automotive
Tools needed:
10mm deep socket or wrench
phillips screwdriver
step 1: Remove trim from around the window
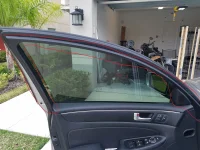
To do so you need to first remove the little push clip at the front of the door
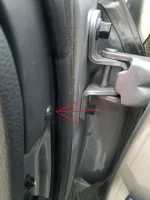
Once that push pin is removed you can just pull on the bottom corner and run your fingers around the edge and it should easily come off. Be careful if you have a tweeter there as there is a connection to remove.\
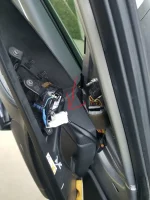
Once that connection is disconnected you should have that trim piece free
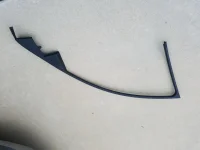
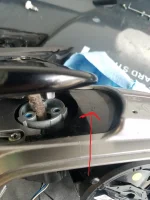
Once that is done you can now remove the mirror from the car itself. Start by undoing the 3 nuts using a deep well 10mm socket, or a wrench. Then undo the plug.
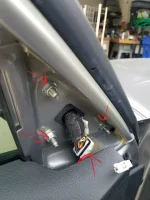
Once the mirror is out find yourself a nice place to work, I would recommend a rag or paper towel to put the mirror on to keep from scratching it.
Next you will need to remove the mirror itself from this assembly, I turned my mirror all the way to the left and then pried from the right side. Be careful as you don't want to break the glass. If you didn't turn the mirror before hand (like me) just plug it back in and do it.
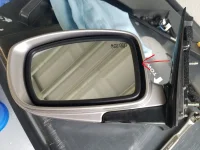
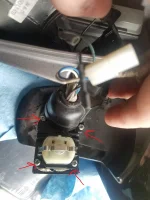
Once the mirror is popped free there are a couple connectors on the back to undo, this doesn't have to be done, but it made the job easier once I did it because I didn't have an extra piece flopping around in my way.
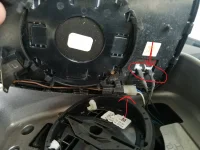
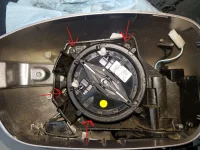
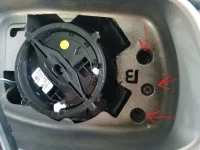
Next you will need to remove the plastic trim Its just 3 phillips screws and some prying, I started on the same side as the screws. Again be careful as to not break anything
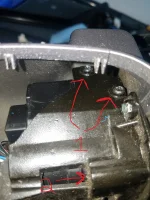
Next you need to go to the underside of the mirror, I don't have a great picture of this but you will understand when you see it. There is a cover (1) that needs to be removed to gain access to more screws(2). The screws are already removed in this photo. Im not sure the best way to remove this cover personally, I used a pick but still managed to scratch it a little bit. On the bright side its on the bottom of the mirror and no one should see it.
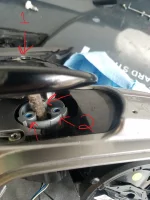
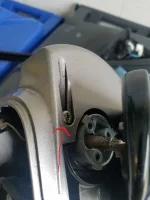
Once those 3 screws are removed you need to remove the one screw you just uncovered
I hit picture limit.........
Thanks to @BarryG for the original post that helped me find the gear and to @badmrscary for the instruction on how to pop the glass off
Part off amazon:
Amazon.com: Bross BGE552 Side Mirror Repair Gear for Hyundai I30 Chevrolet Captiva: Automotive
Tools needed:
10mm deep socket or wrench
phillips screwdriver
step 1: Remove trim from around the window

To do so you need to first remove the little push clip at the front of the door

Once that push pin is removed you can just pull on the bottom corner and run your fingers around the edge and it should easily come off. Be careful if you have a tweeter there as there is a connection to remove.\

Once that connection is disconnected you should have that trim piece free

Once that is done you can now remove the mirror from the car itself. Start by undoing the 3 nuts using a deep well 10mm socket, or a wrench. Then undo the plug.

Once the mirror is out find yourself a nice place to work, I would recommend a rag or paper towel to put the mirror on to keep from scratching it.
Next you will need to remove the mirror itself from this assembly, I turned my mirror all the way to the left and then pried from the right side. Be careful as you don't want to break the glass. If you didn't turn the mirror before hand (like me) just plug it back in and do it.

Once the mirror is popped free there are a couple connectors on the back to undo, this doesn't have to be done, but it made the job easier once I did it because I didn't have an extra piece flopping around in my way.

Next you will need to remove the plastic trim Its just 3 phillips screws and some prying, I started on the same side as the screws. Again be careful as to not break anything

Next you need to go to the underside of the mirror, I don't have a great picture of this but you will understand when you see it. There is a cover (1) that needs to be removed to gain access to more screws(2). The screws are already removed in this photo. Im not sure the best way to remove this cover personally, I used a pick but still managed to scratch it a little bit. On the bright side its on the bottom of the mirror and no one should see it.

Once those 3 screws are removed you need to remove the one screw you just uncovered

I hit picture limit.........
Last edited:


