dcrob95
Registered Member
- Joined
- Jun 12, 2018
- Messages
- 69
- Reaction score
- 44
- Points
- 18
- Genesis Model Type
- 2G Genesis Sedan (2015-2016)
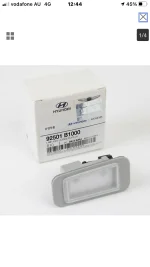
Do you happen to have a part number for the license plate LED? I just saw one of mine is very dim and in need of replacement.I just replaced one of my license plate lights. It was dim, and although it passed state inspection I still wanted to replace it. They may not have noticed it in the shop lighting during the inspection, but the difference was very noticeable at night.
I also expected this to be a much easier job than it was. I'll add a write-up here instead of making a new thread:
- Time: 1-2 h. It can probably be done in about an hour if you know what to do.
- Tools: Small Phillips screwdriver, large Phillips screwdriver, small flat blade screwdriver, 10 mm nut driver, plastic pry tool (you can use a flat blade screwdriver, but you risk scratching some of the components).
- Open the warning triangle holder (small plastic bracket in the top center of the trunk lid), and remove the single screw holding it in place. It hooks into the trunk using curved hooks at the end, as shown in the picture.
- Remove the single Phillips screw on the handle inside the trunk. You can leave the handle connected to the carpet, it'll come out with the carpet.
- There are two push pins located on the side of the plastic cover over each hinge, as shown in the picture. Press the center of the push pin in about 1/8", then pry out the pin.
- Insert a small flat blade screwdriver into the four push pins holding the carpet to the trunk lid and pry up the center pin. Then, pry the entire pin out of its hole.
- Gently pull the carpet away from the trunk lid. The handle and the plastic cover over the trunk latch should come out with the carpet, but you can remove them separately if desired. The trunk closing buttons remain installed, and the carpet flexes around them.
- Remove the three 10 mm nuts holding each tail light into the trunk lid and remove the tail lights.
- Remove the three 10 mm nuts holding the body panel with the license plate. I removed the license plate, but I'm not sure if this is required. Gently pry the body panel away from the trunk lid. You'll feel the push pins give as you pry.
- Remove the four small Phillips screws in the yellow clips that hold the trim piece above the license plate where the lights are mounted. You can see two of them in the picture. The one on the left-hand side is hidden behind a round black component (possibly an actuator to open the trunk remotely). I did not remove it since I was replacing the right side light. I could flex the panel away to remove the light. If you need to replace the left side light, you may need to remove this component to access the screw.
- Use a small flat blade screwdriver to press the top of the clip that holds the wire connector into the license plate light and pull. It shouldn't take much force to pull out; if it won't come out you need to press the clip harder.
- Squeeze the gray clips on the side of the license plate light and push it out through the panel.
- Reinstall everything in reverse order. To install the plastic push pins: Back out or remove the center pin, insert the outer portion into the hole, them push the center pin until it's flush with the outer portion.
Thanks!


