mcginnpm
Registered Member
- Joined
- Jul 22, 2009
- Messages
- 424
- Reaction score
- 37
- Points
- 28
- Location
- The Low Country of South Carolina
- Genesis Model Year
- 2017
- Genesis Model Type
- Genesis G80
I finally got around to changing the fuel filter today on my 2009 Genny 4.6L sedan. I gotta wonder what the engineers at Hyundai were thinking of when they designed this. It would have been so much easier to put a standard fuel filter somewhere along the fuel feed line OUTSIDE of the fuel tank. The procedure turns out to be not all that difficult for anyone who's mechnically inclined. It just seems intimidating.
Step 1 - Safety first. Make sure you've got a fire extinquisher on hand that's rated for a fuel fire and make sure you're working in a well ventilated place with no sources of ignition around.
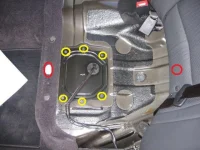
Step 2 - Remove the rear seat cushion: remove the two 13mm bolts that you'll find between the seat cushion and the back cushion, pull up on the lower front edge of the seat cushion to disengage the front brackets, and then pull it foward to remove it (see red circles in JPEG #1)
Step 3 - Remove the six Phillips head screws on the fuel pump access panel on the left side behind the driver's seat (see yellow circles in JPEG #1)
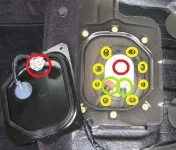
Step 4 - Disconnect the electric pump wiring connector (see red circles in JPEG #2)
Step 5 - Start the motor and let it run until it conks out (this helps to bleed pressurized fuel from the fuel feed line) and then turn off the ignition.
Step 6 - Disconnect the suction hose and the fuel feed line (see green circles in JPEG #2). Have plenty of rags ready as there will still be some residual pressure in the line. I had about a ounce of fuel squirt out when I disconnected the fuel feed line even after turning over the engine several times after it conked out.
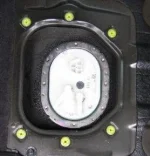
Step 7 - Remove the eight Phillips head bolts (see the yellow circles in JPEG #2) and the black retaining ring. JPEG #3 shows the fuel pump assembly with everything disconnected and removed just prior to lifting it out of the fuel tank.
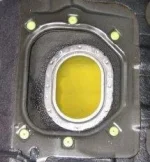
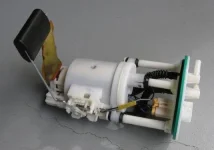
Step 8 - Carefully lift the fuel pump assembly out of the fuel tank. Again, have plenty of rags to catch the drips and spills. You'll need to rotate the pump back as you lift it out to clear the fuel sender arm and float. JPEG #4 show the fuel tank with the fuel pump removed and JPEG #5 shows the fuel pump assembly on my garage floor.
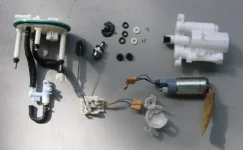
Step 9 - Disconnect the electric pump and fuel sender connectors, remove the fuel sender arm, remove the assist pump, disconnect the fuel feed tube, remove the electric pump/pre-filter, remove the fuel pressure regulator, and remove the top plate. If you look carefully at the pump, you'll see all the connectors and clips that need to be disconnected to take the fuel pump assembly apart. A couple of small flat head screw drivers will help with unclipping all the clips and a small hooked tool will be helpful to remove the O-rings from the old filter. Bottom line - take your time and don't force any of the clips or connectors. You certainly don't want to break one. JPEG #6 shows the fuel pump assembly completely broken down (the fuel filter is the white plastic part in the upper right). Make note of all the parts in the picture and make sure you've removed them from the old filter element before you re-assembling the new filter.
Assembly is the reverse of the above steps. When you re-insert the fuel pump assembly back into the fuel tank be carefull that the green gasket seats properly . Overall, this should run you around 30 minutes to an hour to complete.
If you're interested in seeing how to change the fuel tank air filter, go to my post here: http://www.genesisowners.com/hyundai-genesis-forum/showpost.php?p=92435&postcount=15


