Incredible offer, Mr. Incredible.
Too kind.
But, a moot point, however.
The teardown:
1 - Pry snaps to remove lower front dashboard trim. Unplug connector to key cubby to be able to get panel well out of the way.
2 - Pop gear select knob off of shaft. This took a crowbar & some don't-scratch-up-the-interior-too-badly shop rags.
3 - Pry snaps to raise elbow rest top cover of center console.
4 - Shift into D to get a better angle on pulling off the console.
5 - Unplug 3 or so connectors to be able to slip the console panel over the gear selector shaft. Because I found it very difficult to squeeze the connectors to unplug them, I found that I could keep 2-3 connectors plugged in & flip console over to gain adequate access to the keyboard area.
6 - Undo 4 Phillips screws to remove the 96540-3M300-GS7 assembly (at least per the label on mine). Go to workbench to work properly.
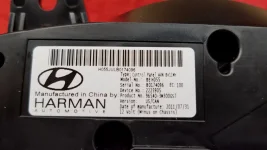
7 - Unit back cover is held on by 8 Torx screws. Unfortunately, I didn't have quite the right size Torx driver bit, so I stripped the head on the 8th screw after pulling out the other 7 easily. I tried a few driver bits & then had luck with a tapered tri wing driver bit that bit adequately well into 3 corners to be able to pull out the screw. Fortunately, they require little torque to break free & back out.
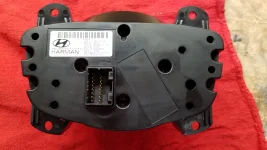
8 - PCB is revealed. On the top side, just 1 connector snaking up through a hole is keeping PCB attached to assembly.
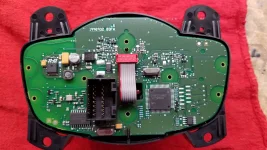
9 - Pull away PCB to peek underneath. Find that unplugging that 1 connector will indeed release the PCB.
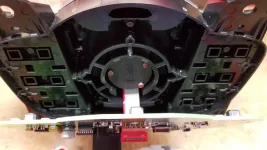
10 - Notice that there are indeed 7 surface mount switches that correspond to the 7 buttons that surround the knob. But my problem is the knob push-in switch, so I don't care about these.
So, in reference to Mr. Incredible's post, if anybody has trouble w/ any of these 7 switches, these are pretty easy to get to, remove & replace.
11 - Pop off ribbon cable connector on top side of PCB. Remove PCB. This reveals that the ribbon cable comes from a sealed canister under the knob, & it must be this ribbon cable that is sending the PCB the knob's signals: twist L/R, push U/D/L/R, push in. 3 heavily globbed teensy weensy nuts hold a cover down.
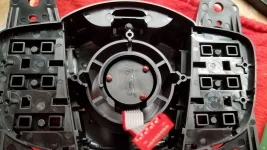
12 - Remove 3 nuts *carefully* from their studs. Don't lose the 3 teensier weensier lock washer under each nut! You're now presented with a ball bearing on a compression spring. Also easy to lose. This gives the knob its upward preload, so it snaps back up after you push it in.
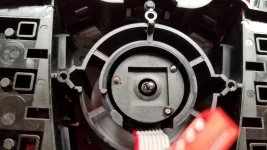
This is where I punted. The canister looks stout, I don't see a means of getting inside it, & I don't see a method to remove the canister from the frame. This might involve popping off the silver knob from the top side & then releasing the canister downward, but other posters in this thread lament the pains of a broken knob, & my knob is currently intact, so I'm not going to yank on it--I've already leaned on this thing *hard* to get the push-in switch to come back to life when it's in a coma, so the knob could very well be 1 yoink away from breaking.
Hope this was of help. If somebody knows the next steps to getting into that knob canister, please do share.
Thanks,
-Jason


