Sarge101st
Registered Member
- Joined
- Oct 23, 2019
- Messages
- 87
- Reaction score
- 52
- Points
- 18
- Location
- Sarasota
- Genesis Model Type
- 2G Genesis Sedan (2015-2016)
So my driver's side DRL/turn signal bulb died and after a trip to Autozone today I realized these can be easily swapped for LED switchbacks. When purchasing replacement bulbs for this light you can buy the original 2057 halogen bulb but due to the fact that they operate as a DRL they'll burn out quickly. I did install 1 1157 LED bulb today as well as an original replacement 2057 bulb to test them out. Both work but as expected the 1157 LED draws such low power that the vehicle thinks it's dead and the hyperflash pace picks up, but at least we know they fit.
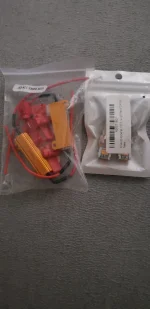
Option 1 for LED replacement is by amber LED or switchback (dual function white DRL and amber turn signal,) LED and install resistors to ensure that the vehicle recognizes a standard power draw and the turn signals flash at the standard speed. Without the resistors your vehicle will think the bulbs are dead and the hyperflash pace will kick in (more rapid pulsing,) as it's a natural function where vehicles can indicate to you there is a problem. The bulbs and resistors would be something like these:
This option is inexpensive but requires some wiring know how and more install time.
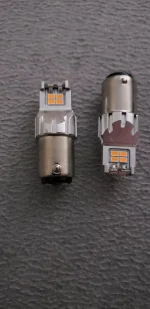
Option 2 is an all in one LED hybrid that includes built in resistors at the base of the bulb such as this option:
This is the option that I'm going with instead. Bulbs should be here by Wednesday and I'll have them installed that day. If anyone wants to know how it goes let me know.
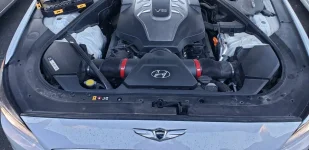
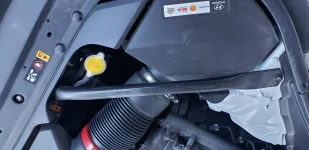
BTW the install is very easy no matter which option you choose even with the larger 5.0 engine. Removing the bay cover plate from the front is just removing about 12 cowl clips. I recommend a cowl clip removal tool as it makes this easy. Also if you need more cowl clips these are direct OEM replacments that can be had on Amazon. Amazon.com: Clipsandfasteners Inc 15 Cowl & Bumper Push-Type Clips For Hyundai 86155-2H100: Automotive. This is my second box of clips as these definitely break easy.
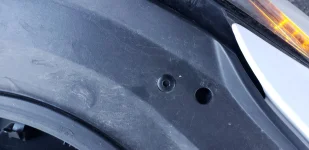
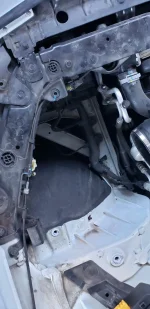
Once the plate is removed use a 12mm socket to loosen and remove the two cross braces that cover the air intake boxes. Use a 10mm socket to remove the screws holding the air intake boxes in place. You can use the 10mm socket again or a philips screwdriver to loosen the hose clam connecting the air intake box to the hose leading to the engine. That hose clamp can also be replaced if needed with a 3-4" diameter hose clamp from your local hardware store.
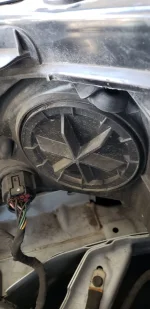
Once those air intake boxes are out of the way it's as simple as unscrewing the moisture plates from the housings, unscrewing the bulb harness from the housing, pressing in and unscrewing the bulb from the harness/outlet, and replacing with new bulb. Reverse previous steps when done to put everything back together.
After doing this today I think I'll look into replacing the HID's with new Morimoto's or something high end. Anyone attempted this yet on the Gen2 with a 5.0?
Option 1 for LED replacement is by amber LED or switchback (dual function white DRL and amber turn signal,) LED and install resistors to ensure that the vehicle recognizes a standard power draw and the turn signals flash at the standard speed. Without the resistors your vehicle will think the bulbs are dead and the hyperflash pace will kick in (more rapid pulsing,) as it's a natural function where vehicles can indicate to you there is a problem. The bulbs and resistors would be something like these:
Amazon.com: iBrightstar 50W 6ohm Load Resistors - Fix LED Bulb Fast Hyper Flash Turn Signal Blink Error Code: Automotive
Buy iBrightstar 50W 6ohm Load Resistors - Fix LED Bulb Fast Hyper Flash Turn Signal Blink Error Code: Turn Signal Bulbs - Amazon.com ✓ FREE DELIVERY possible on eligible purchases
www.amazon.com
This option is inexpensive but requires some wiring know how and more install time.
Option 2 is an all in one LED hybrid that includes built in resistors at the base of the bulb such as this option:
Amazon.com: LASFIT CANBUS Anti Hyper Flash 1157 2057 7528 Dual Color Switchback LED Amber Turn Signal Light Blinker Bulbs, White Daytime Running Parking Light, No Load Resistor Need, Unique Version (Pack of 2): Automotive
Buy LASFIT CANBUS Anti Hyper Flash 1157 2057 7528 Dual Color Switchback LED Amber Turn Signal Light Blinker Bulbs, White Daytime Running Parking Light, No Load Resistor Need, Unique Version (Pack of 2): Turn Signal Bulbs - Amazon.com ✓ FREE DELIVERY possible on eligible purchases
www.amazon.com
This is the option that I'm going with instead. Bulbs should be here by Wednesday and I'll have them installed that day. If anyone wants to know how it goes let me know.
BTW the install is very easy no matter which option you choose even with the larger 5.0 engine. Removing the bay cover plate from the front is just removing about 12 cowl clips. I recommend a cowl clip removal tool as it makes this easy. Also if you need more cowl clips these are direct OEM replacments that can be had on Amazon. Amazon.com: Clipsandfasteners Inc 15 Cowl & Bumper Push-Type Clips For Hyundai 86155-2H100: Automotive. This is my second box of clips as these definitely break easy.
Once the plate is removed use a 12mm socket to loosen and remove the two cross braces that cover the air intake boxes. Use a 10mm socket to remove the screws holding the air intake boxes in place. You can use the 10mm socket again or a philips screwdriver to loosen the hose clam connecting the air intake box to the hose leading to the engine. That hose clamp can also be replaced if needed with a 3-4" diameter hose clamp from your local hardware store.
Once those air intake boxes are out of the way it's as simple as unscrewing the moisture plates from the housings, unscrewing the bulb harness from the housing, pressing in and unscrewing the bulb from the harness/outlet, and replacing with new bulb. Reverse previous steps when done to put everything back together.
After doing this today I think I'll look into replacing the HID's with new Morimoto's or something high end. Anyone attempted this yet on the Gen2 with a 5.0?