kocyk123
Registered Member
- Joined
- Feb 1, 2016
- Messages
- 519
- Reaction score
- 341
- Points
- 63
- Location
- Gilberts, IL
- Genesis Model Type
- 2G Genesis Sedan (2015-2016)
Google Docs link:
2015 Hyundai Genesis LED DRL mod
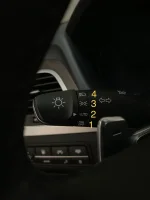
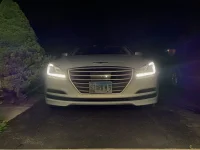
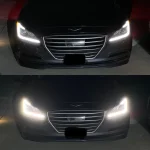
This mod will turn on your DRL LED (bright) with the ignition. There are two options to install it:

STEP 1 - Fuse Box inside the car
Remove the lower cover under the steering wheel so you have better access to the fuse panel and other wires. You will add 4 wires here. I have used ethernet cable since it has four wires inside and that way, it was easier to fish them through the firewall inside the engine compartment.
Add two new wires, one to #1 (red/black - right rear blinker) and one to #2 (red - left rear blinker) - I have used quick tap to connect size 18 - 22

Add the other two wires to a fuse tap connector (it is micro2 fuse tap)


I plugged them into the MODULE and PRESAFETY SEAT BELT because these two turn on with the ignition and this is when your DRL will turn on too. Please insert the fuse tap the same direction I did. There is a - and + so if you plug them in the other way and there is a problem with circuit, the fuse will not blow, instead it will keep the power going which will might end up really bad.
Below is an instruction on how to insert 2 fuses into fuse tap:

1 - 10amp fuse will go here
2 - original fuse from the fuse box
(Red circles are the positive + connectors)
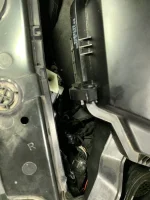
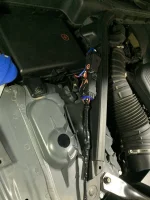
STEP 2 - Fish 4 newly added wires through the firewall to the engine compartment (you will find it to the left of the brake pedal):
(borrowed this picture from another Genesis forum member)

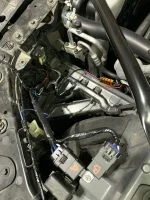
STEP 3 - Adding extra wire inside the headlight
Since I have skinny hands I was able to do this step without removing bumper and headlight. If you have a skinny hands, you are lucky because you just saved yourself plenty of time!
Headlight - remove the covering caps on the back and bottom of the headlight. Get your 22awg cable ready. I have used cable from the desktop computer:

I removed them from the plastic plug. These metal ends fit perfectly in the headlight.
Unplug the black connector with two wires. As you can see, there is a spot for a third one which you will add now.

Unlock the black connector:

Add the new wire to it and lock it back.
Here is how it should look now:

Red is the new wire that I added. You can plug the connector back into the headlight.
Now you need to drill a tiny hole in the headlight so you can run your newly added wire to the outside of the headlight. Run your cable and use silicone to seal the hole.
STEP 4 - adding 5 pin relays (they must be minimum 20amp)
There will be 2 relays per headlight so you need a total of 4.
1st relay will be responsible for adding the 12v power from the inside of the car (fuse tap) to the new cable that we have added inside the headlight that turns on LED in the bright DRL mode. We are going to connect the parking light wire to this relay which triggered by parking light, will cut the 12v power from the bright LED DRL and put them into regular dim mode for when parking lights or headlights are on.
2nd relay will be responsible for the blinker. We are going to add 12v from the fuse box inside the engine bay (we will also use a fuse tap here) and the new wire from the rear blinker that we ran from the inside of the car. This will connect to the front blinker. The original blinker/DRL wire that comes from the car will be connected with the resistor that will prevent the blinker hyper flash.
Connecting first relay:

85 - Ground
86 - find PIN 11 on the headlight connector and cut it (before you do it, remove the black tape that is wrapped around these wires so you have easier access)
Below pin diagram is for the Right Headlamp. The wires on the left one will be different colors so make sure you are cutting the right wires.

Strip both ends of the wires so you can connect them. The wire that comes from the car needs to be connected to pin 86 on the relay
87 - connect this pin with the wire that goes to the connector that plugs into the headlight (pin 11)
87a - connect this pin with the new DRL LED wire that we added inside the headlight
30 - connect this pin with 12v wire that comes from the inside of the car (fuse tap)
Second relay:
85 - ground
86 - connect this pin to the rear blinker wire that we ran from the inside of the car
87 - connect this pin to the 12v wire that goes in the fuse box inside engine compartment (use a fuse tap):

30 - What you have to do first, is to find pin 10 wire that goes to the headlight connector, cut it and strip both ends. connect relay pin 30 with the blinker wire (pin 10) that goes to the headlight connector.
Now repeat the same process for another 2 relays for the second headlight.
STEP 5 - adding 50W 6ohm resistors to stop blinker hyper flash
Find the wire that we cut from pin 10 going from the connector. You are going to connect this wire with one end of the resistor. The other end of resistor goes to ground. Do this on both headlights. Remember to install the resistors on metal surface as they get very hot when they operate:

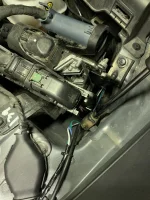
Voila. That is all. Make sure everything works well. Clean up the wires in the engine compartment so they look clean and relatively professional ;-)
2015 Hyundai Genesis LED DRL mod
This mod will turn on your DRL LED (bright) with the ignition. There are two options to install it:
- Stock setup - when on AUTO, bright LED is on. When blinker kicks in, bright LED switches of until blinker stops (a lot of new card do it)
- My personal preference - when on AUTO, bright LED stays on even when the blinker kicks in.
STEP 1 - Fuse Box inside the car
Remove the lower cover under the steering wheel so you have better access to the fuse panel and other wires. You will add 4 wires here. I have used ethernet cable since it has four wires inside and that way, it was easier to fish them through the firewall inside the engine compartment.
Add two new wires, one to #1 (red/black - right rear blinker) and one to #2 (red - left rear blinker) - I have used quick tap to connect size 18 - 22
Add the other two wires to a fuse tap connector (it is micro2 fuse tap)
I plugged them into the MODULE and PRESAFETY SEAT BELT because these two turn on with the ignition and this is when your DRL will turn on too. Please insert the fuse tap the same direction I did. There is a - and + so if you plug them in the other way and there is a problem with circuit, the fuse will not blow, instead it will keep the power going which will might end up really bad.
Below is an instruction on how to insert 2 fuses into fuse tap:
1 - 10amp fuse will go here
2 - original fuse from the fuse box
(Red circles are the positive + connectors)
STEP 2 - Fish 4 newly added wires through the firewall to the engine compartment (you will find it to the left of the brake pedal):
(borrowed this picture from another Genesis forum member)
STEP 3 - Adding extra wire inside the headlight
Since I have skinny hands I was able to do this step without removing bumper and headlight. If you have a skinny hands, you are lucky because you just saved yourself plenty of time!
Headlight - remove the covering caps on the back and bottom of the headlight. Get your 22awg cable ready. I have used cable from the desktop computer:
I removed them from the plastic plug. These metal ends fit perfectly in the headlight.
Unplug the black connector with two wires. As you can see, there is a spot for a third one which you will add now.
Unlock the black connector:
Add the new wire to it and lock it back.
Here is how it should look now:
Red is the new wire that I added. You can plug the connector back into the headlight.
Now you need to drill a tiny hole in the headlight so you can run your newly added wire to the outside of the headlight. Run your cable and use silicone to seal the hole.
STEP 4 - adding 5 pin relays (they must be minimum 20amp)
There will be 2 relays per headlight so you need a total of 4.
1st relay will be responsible for adding the 12v power from the inside of the car (fuse tap) to the new cable that we have added inside the headlight that turns on LED in the bright DRL mode. We are going to connect the parking light wire to this relay which triggered by parking light, will cut the 12v power from the bright LED DRL and put them into regular dim mode for when parking lights or headlights are on.
2nd relay will be responsible for the blinker. We are going to add 12v from the fuse box inside the engine bay (we will also use a fuse tap here) and the new wire from the rear blinker that we ran from the inside of the car. This will connect to the front blinker. The original blinker/DRL wire that comes from the car will be connected with the resistor that will prevent the blinker hyper flash.
Connecting first relay:
85 - Ground
86 - find PIN 11 on the headlight connector and cut it (before you do it, remove the black tape that is wrapped around these wires so you have easier access)
Below pin diagram is for the Right Headlamp. The wires on the left one will be different colors so make sure you are cutting the right wires.
Strip both ends of the wires so you can connect them. The wire that comes from the car needs to be connected to pin 86 on the relay
87 - connect this pin with the wire that goes to the connector that plugs into the headlight (pin 11)
87a - connect this pin with the new DRL LED wire that we added inside the headlight
30 - connect this pin with 12v wire that comes from the inside of the car (fuse tap)
Second relay:
85 - ground
86 - connect this pin to the rear blinker wire that we ran from the inside of the car
87 - connect this pin to the 12v wire that goes in the fuse box inside engine compartment (use a fuse tap):
30 - What you have to do first, is to find pin 10 wire that goes to the headlight connector, cut it and strip both ends. connect relay pin 30 with the blinker wire (pin 10) that goes to the headlight connector.
Now repeat the same process for another 2 relays for the second headlight.
STEP 5 - adding 50W 6ohm resistors to stop blinker hyper flash
Find the wire that we cut from pin 10 going from the connector. You are going to connect this wire with one end of the resistor. The other end of resistor goes to ground. Do this on both headlights. Remember to install the resistors on metal surface as they get very hot when they operate:
Voila. That is all. Make sure everything works well. Clean up the wires in the engine compartment so they look clean and relatively professional ;-)
Last edited:


