• Car enthusiast? Join us on Cars Connected! iOS | Android | Desktop
  • Hint: Use a descriptive title for your new message
    If you're looking for help and want to draw people in who can assist you, use a descriptive subject title when posting your message. In other words, "I need help with my car" could be about anything and can easily be overlooked by people who can help. However, "I need help with my transmission" will draw interest from people who can help with a transmission specific issue. Be as descriptive as you can. Please also post in the appropriate forum. The "Lounge" is for introducing yourself. If you need help with your G70, please post in the G70 section - and so on... This message can be closed by clicking the X in the top right corner.

Rear Badge

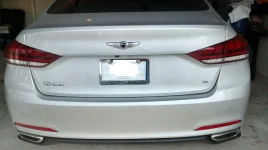
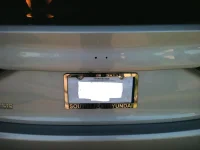
I bought my rear badge from Amazon. I am pretty sure that Hyundai itself made it for the Korean domestic market. I did have to cut off the two mounting posts on the back of the badge, and it only took about 15 minutes work with the fishing line and Goo Gone to clean up the sticky residue on the trunk lid. The badge and packaging I bought from Amazon resembles the one sold on Ebay cited earlier.
 
Last edited:
I have a copy of the Korean Genesis (and Equus) brochure, and for the Genesis, it appears that they're satin in the KDM.
 
I took a good hard look at mine again and I will change my initial post saying it is shiny chrome. It is a satin finish however so slight it can be mistaken for chrome.
 
Anyone have a P/N for the 2015, the one I got on Amazon says
86330 B1000
I'll let you know if it fits. By the way it is satin. On the label it says "Hyundai Wing Rear Trunk E...015 Hyundai Genesis Sedan".
 
Anyone have a P/N for the 2015, the one I got on Amazon says
86330 B1000
I'll let you know if it fits. By the way it is satin. On the label it says "Hyundai Wing Rear Trunk E...015 Hyundai Genesis Sedan".

Yep, that would be the original.
 
BTW, available on eBay from multiple vendors. The one I received was in the original OEM pack, had the "studs" removed very cleanly, and was resealed in the original package. Very professionally done. On the car now, making my wife happy with her car; she's an artist so she "placed" it perfectly.
 
I got my rear emblem on Amazon for $16 and my local body shop charged me $25 (1/2 hour labor rate) to install, couldn't be happier with the look and price paid for the service. Everytime I try to do something like this myself I screw something up and for $25 it was worth not messing up a new car!
 
Just Ordered mine from Amazon. Lets see how it goes. Would keep everyone updated.
 
Just did my rear badge. Took me about an hour. Used a hairdryer and fishing line and it came right off. I also want to remove the 3.8 badge does anyone have any information on removing it? is it attached just by adhesive or does it have holes like the "flying H".
 

Attachments

  • CAR2.webp
    CAR2.webp
    38.7 KB · Views: 168
  • CAR3.webp
    CAR3.webp
    32 KB · Views: 140
Just did my rear badge. Took me about an hour. Used a hairdryer and fishing line and it came right off. I also want to remove the 3.8 badge does anyone have any information on removing it? is it attached just by adhesive or does it have holes like the "flying H".

All other badges on the trunk are simply just double sided sticky tape so just heat up and peel or use fishing line if you wish. Personally I only peel however be careful as it is hot after the airgun.
 
Looking to update and upgrade your Genesis luxury sport automobile? Look no further than right here in our own forum store - where orders are shipped immediately!
Just did my rear badge. Took me about an hour. Used a hairdryer and fishing line and it came right off. I also want to remove the 3.8 badge does anyone have any information on removing it? is it attached just by adhesive or does it have holes like the "flying H".

Go fully naked :D

 
I prefer to perk up the guessing game. :D

1679r1g.jpg
[/IMG]
 
Finally had a decent day yesterday in the Hudson Valley, and swapped out the flying H for wings. I was a bit surprised how much cleaner that simple change made to the rear look. Highly recommend.

For removal I used a weak fishing line and snapped it a couple times. Tried cleanup with WD-40, which just wasn't working, and then some bug & tar remover which eventually got the job done. So it took a little longer than it should have, but if I can do it, anyone can. :o

Now I need to learn how to post a photo. :mad:
 
B.P.
Do you have an Ebay link to the badge you purchased that already had the tabs removed? It's worth a few $ not to have to jack around with removing the pots. Thanks!
 
Don't worry about the tabs. Use a pair of pliers, grip the plastic tabs and just twist them off. Very simple risk free procedure.
 
Back
Top