• Car enthusiast? Join us on Cars Connected! iOS | Android | Desktop
  • Hint: Use a descriptive title for your new message
    If you're looking for help and want to draw people in who can assist you, use a descriptive subject title when posting your message. In other words, "I need help with my car" could be about anything and can easily be overlooked by people who can help. However, "I need help with my transmission" will draw interest from people who can help with a transmission specific issue. Be as descriptive as you can. Please also post in the appropriate forum. The "Lounge" is for introducing yourself. If you need help with your G70, please post in the G70 section - and so on... This message can be closed by clicking the X in the top right corner.

2015 Hyundai Genesis 5.0 lower front timing cover replacement

I think the K900 has it too.
True. I forgot about the one KIA model with the 5.0 engine. So three models total with the 5.0 V8 engine.

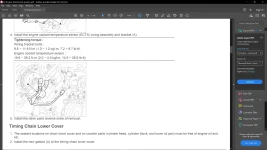
LOL. Here is what the service manual has for the coolant sensor which is 14ft/lbs-28 ft/lbs. This could be a problem as well that can cause some cracked front timing covers and a part shortage if these simple sensor changes are leading to replacement timing covers at dealerships service centers.

I will just install the oil and coolant sensors on my new cover only to the same amount of thread depth as the old ones on the cover.
1660311293416.png
 
True. I forgot about the one KIA model with the 5.0 engine. So three models total with the 5.0 V8 engine.

LOL. Here is what the service manual has for the coolant sensor which is 14ft/lbs-28 ft/lbs. This could be a problem as well that can cause some cracked front timing covers and a part shortage if these simple sensor changes are leading to replacement timing covers at dealerships service centers.

I will just install the oil and coolant sensors on my new cover only to the same amount of thread depth as the old ones on the cover.
View attachment 47518
Seems to be a lot of torque for that sensor... Not like there's a ton of pressure there.
 
Looking to update and upgrade your Genesis luxury sport automobile? Look no further than right here in our own forum store - where orders are shipped immediately!
Seems to be a lot of torque for that sensor... Not like there's a ton of pressure there.
Agreed.

It may not be an issue, but I will just use the factory installed coolant and oil sensors as a guide since I know first hand that the oil pressure sensor factory tighten specs is too much. It seems that Hyundai technical writers may have dropped the ball with the NPT type sensor torque specs in the service manuals.
Lost in translation maybe - perhaps it was meant to be in-lbs...
 
Today I finally got all my HVAC tools needed and got the recovery tank down below 500 microns of vacuum with a quality Robinair brand vacuum pump. The cheap OMT brand vacuum pump was useless because it could only get the tank down to about 3500 microns, so I have to return it.

Next I will pull out the 134a refrigerant and then the pull the AC compressor and AC lines.

It is good to have a vacuum gauge that reads microns and a good quality vacuum pump to pull a good vacuum to remove all water and air out of the AC system; including the recovery tank used to hold the refrigerant. Less than 500 microns is the goal. I pulled it down to about 280 microns.
52282938588_ccf3f62f62_k.jpg

52282927266_82693e3b3f_k.jpg
 
Last edited:
Alright; I pulled over 1lb of refrigerant out the Genesis. The gauges read zero psi or vacuum so I guess that was all(or most) in the system. Now I can pull the AC line and compressor.

My recovery tank dry weigh was 16.17 lbs. The weight after recovery is 17.30lbs. Now I properly remove my AC lines without causing harm to the ozone layer.:)

Now I have to pull my sleeves up and start the real work of this repair. The tear down.

The gauges and tank weight.
52284162466_f2675782a4_k.jpg

52284160471_f577888c7d_k.jpg
 
I removed the AC lines and compressor. The lines only need a 10mm socket(or wrench) and the compressor only needed a 12mm socket (or wrench) to remove. Now, I will do a little more planning and start removing the valve covers and intake manifold.

The AC parts removed. Now I have much more room to work with. I only need to remove the dip stick tube and the rest of the wiring harness to have perfect access to the driver side valve cover.
52284686679_1cc2f245c4_k.jpg
52284418421_6ec667ed7b_k.jpg
 
I decided to remove the intake manifold first. Not the easiest job, but not the worst intake I had to remove over the years. Hyundai did make it easy to access the valley area on the 5.0 engine. Toyota V6 and GM LS engines requires the fuel rails to be removed. Some other engines also requires a lower intake manifold to be removed as well.

The main hurdle on this engine is the various harness and hoses connected to the intake manifold that needs to be removed in a tight area.

I will change the knock sensors, coolant pipe o-rings, and clean the valve stems. My valve stems are dirty, but not as bad as some other direct injected engines I have seen with this mileage. The intake runners and valves are mostly clean for a directed injected engine with 90k miles.

The intake manifold removed. Perfect access to the valley area of the engine and valve stems.
52286469268_6c6b78fd58_k.jpg


Knock sensors
52286465511_dee6ed8663_k.jpg


My dirty valve stems. Intake runners are also dirty, but not to point that they are blocked with carbon.
52286953350_795800e10d_k.jpg
 
... Now I properly remove my AC lines without causing harm to the ozone layer.:)

...
R12 depleted ozone. R-134a does not. The complaint with R-134a is that it is a greenhouse gas. It interesting that those duster cans use (or at least used to) pretty much the same formula as R-134a, but are allowed to vent.
R-134a has gone up in cost a good bit lately, but it is still way less expensive than R-1234yf, so you are lucky there.
______________________________

Help support this site so it can continue supporting you!
 
R12 depleted ozone. R-134a does not. The complaint with R-134a is that it is a greenhouse gas. It interesting that those duster cans use (or at least used to) pretty much the same formula as R-134a, but are allowed to vent.
R-134a has gone up in cost a good bit lately, but it is still way less expensive than R-1234yf, so you are lucky there.
I have read that 134a is "supposed" to be ozone friendly, but the EPA still do not want it released into the air. I just decided to do it the correct way and recycle my old refrigerant.
 
Last edited:
I removed the high pressure fuel pumps. Fairly easy. The pumps are held by only two 10mm bolts. The high pressure lines are held by a 19mm nut and the low pressure lines uses quick release fittings. I only had little fuel drain out, however my engine has been shutdown for a couple weeks so the fuel pressure was very low.

My fuel pump cam followers are as good as new. I guess using 5w-30 oil and 4k miles oil change intervals prevented them from wearing. I did not need to buy new cam followers it seem, but I will change them anyway since I do have new ones.


Note: To properly remove the fuel pump 10mm bolts; you will have to alternate removing each bolt to prevent the pump from going to one side during removal. The pump is spring loaded so it has to be released with equal pressure on each side to prevent damage to the piston.


My old pump and follower removed. Both seem to look pretty good with 90k miles on them. Both sides looked similar.
52286568217_2759ae4129_k.jpg


The cam follower can be plucked out the valve cover with a set of slim needle nose pliers that fit into the two holes in the back of the follower.
52287548583_30088257c9_k.jpg
 
Last edited:
I decided to remove the intake manifold first. Not the easiest job, but not the worst intake I had to remove over the years. Hyundai did make it easy to access the valley area on the 5.0 engine. Toyota V6 and GM LS engines requires the fuel rails to be removed. Some other engines also requires a lower intake manifold to be removed as well.

The main hurdle on this engine is the various harness and hoses connected to the intake manifold that needs to be removed in a tight area.

I will change the knock sensors, coolant pipe o-rings, and clean the valve stems. My valve stems are dirty, but not as bad as some other direct injected engines I have seen with this mileage. The intake runners and valves are mostly clean for a directed injected engine with 90k miles.

The intake manifold removed. Perfect access to the valley area of the engine and valve stems.
52286469268_6c6b78fd58_k.jpg


Knock sensors
52286465511_dee6ed8663_k.jpg


My dirty valve stems. Intake runners are also dirty, but not to point that they are blocked with carbon.
52286953350_795800e10d_k.jpg
This is turning into quite the write up - lot of good info here!

I follow much the same oil service sked - filter & change every 3,500 - 4,000 miles. The valve stems do seem relatively clean - an early VW 2.0 turbo would have charcoal briquettes in there by now. Hopefully, my 2015 5.0 @ 102k is still in equal shape. I do perform an "Italian Tuneup" weekly for er, Preventative Maintenance.
I believe that your engine is in good shape also with the shorter oil change intervals.

Correction: I use 5w-30 Valvoline high mileage synthetic oil; not 5w-40 oil.
 
I pulled the water pump and it was also fairly easy to remove and was good shape at 90k miles. The hardest part was removing the pulley adapter bolts since it spins when trying to break the 12mm bolts loose. I ended up using an air impact to remove the pulley adapter bolts easily. The water pump itself is only held by nine 10mm bolts and two dowel pins. To release the pump form the dowel pins I used a small block of wood and a rubber mallet.

I decided to pull the water pump due to having two heater hoses that need to be removed that sits over the rear of the engine. The heater hoses still has some coolant trapped in them that is held by the water pump and would probably dump coolant in the open engine ports, so I pulled the water pump and drain the coolant left in the engine block and hopefully the heater hoses.

From what I tell so far; the 5.0 engine is made well and the typical wear parts are doing fine at 90k miles. Hyundai did a good job with this engine and it is fairly easy to disassemble.

Note: If you removed the crank puller(damper); put it back into the engine before removing the water pump to prevent coolant from going into your oil pan.

The best way to quickly remove the water pump pulley adapter bolts.
52288896517_ab192224e9_k.jpg


The water pump without its pulley adapter and it removed from the engine. It looks and spins as good as new. Even the gasket still seems good.
52288895522_195e9ed571_k.jpg

52289870336_f7f5624edc_k.jpg

52289871181_2c42e5c719_k.jpg


The heater hoses in the rear of the engine. Easy to pull also with quick connectors. However, they could be problem if they dump coolant in an open engine like in my case.
52289872216_08b10088b0_k.jpg
 
I believe that your engine is in good shape also with the shorter oil change intervals.

Correction: I use 5w-30 Valvoline high mileage synthetic oil; not 5w-40 oil.
Yeah... I'd never wait until 7,500 mi or whatever to change oil. It might last, but it would still be dirty. Might try the high mileage stuff sometime.
 
.
 
Last edited:
I have read that 134a is "supposed" to be ozone friendly, but the EPA still do not want it released into the air. I just decided to do it the correct way and recycle my old refrigerant.
R-1234yf is a European standard....and a mighty interesting one. Car Ninja (on Youtube) has a video on how they replace the refrigerant on an Audi. It takes up to 4 HOURS. Did I mention that 1234YF is HIGHLY flammable. It's the reason Mercedes fought the EU on adoption because they had a few cars go up while testing.

Video: Jul 21, 2022
 
Last edited:
@carguy75 , what impact wrench is that you were using in the picture above? I might have to look for one of those.
 
Back
Top