• Car enthusiast? Join us on Cars Connected! iOS | Android | Desktop
  • Hint: Use a descriptive title for your new message
    If you're looking for help and want to draw people in who can assist you, use a descriptive subject title when posting your message. In other words, "I need help with my car" could be about anything and can easily be overlooked by people who can help. However, "I need help with my transmission" will draw interest from people who can help with a transmission specific issue. Be as descriptive as you can. Please also post in the appropriate forum. The "Lounge" is for introducing yourself. If you need help with your G70, please post in the G70 section - and so on... This message can be closed by clicking the X in the top right corner.

2015 Hyundai Genesis 5.0 lower front timing cover replacement

carguy75

Registered Member
Joined
Jun 23, 2018
Messages
3,067
Reaction score
1,640
Points
113
Location
Atlanta, Georgia
Genesis Model Year
2015
Genesis Model Type
2G Genesis Sedan (2015-2016)
Well, I ended up damaging my front lower timing cover due to over tightening my new oil sensor. Therefore, I will be replacing the timing cover. I will also change my spark plugs, high pressure fuel pump roller cam follower, and timing chain tensioners while the engine is apart. I will first remove the valve covers.

I am still learning about the TAU 5.0 engine so I will post the repair as I perform it with tips and information I learn. So far I have started to remove the engine covers and wiper cowl to gain access to the valve covers.

Here is where I am at so far. This engine have a lot of cover trim/harness supports under the hood, but they are only held by 10mm nut/bolts and push clips. The wiper blades are only held by 14mm nuts. Mark the wiper location with tape so that you can put them back in the proper location when you install them.
52249493738_6eab1b8cdc_k.jpg
 
Good luck and keep us posted. This adventure has been better reading than most books.
 
Open heart surgery. Good luck, sir...
 
Open heart surgery. Good luck, sir...
Pretty much. Thank you:)

I have done a few oil pan and front timing cover gaskets in my time.
Removing a timing chain is a very tricky process so I will not remove it unless it does seem stretched and the timing chain guides are broken due to possibly causing more problems if the timing is not correctly setup among the various camshafts.

Hence, why I will not touch the timing chain and actuators unless the engine has more than 200k miles or they seem defective. If not, then i will only be swapping out the old chain tensioners.

My car has 90k miles so this type of repair will happen eventually. The risk of owning a high mileage car. Bolts and parts breaks sometime even when you do the right thing when repairing a car.
 
Last edited:
annnd when you're all done clean up that engine compartment - :)
I must admit that my engine bay is dirty as heck. In my younger days I would not have let it get this bad, but now I tend to have so much going on that I do not detail my cars like I used to. Just the bare minimum.:)
 
I got my replacement lower front timing cover today. It seems to be in fairly good condition. The only issue I see is a chipped lip that sits under the oil pump chain under the crankshaft, but I saw that when I checked it out online. I can now take a good look at how the RTV was applied from the factory and how much to use; as well as the bolt locations.

From what I can see; I do not have to remove the upper oil pan to remove the lower front timing cover; which save some time on this repair since I do not have to drop the sub-frame. However, I will have to remove the upper intake manifold, alternator/bracket, water pump, valve covers, oil filter housing/cooler,and upper timing covers to properly remove the lower timing cover. Plus , I will need a lot of new gaskets it seems also.
52250278242_ba8de41b38_k.jpg

52251266038_7f022e199a_k.jpg
 
Last edited:
Looking to update and upgrade your Genesis luxury sport automobile? Look no further than right here in our own forum store - where orders are shipped immediately!
I got the wiring harness and rear engine shield removed(mostly). I still have to disconnect the coil packs and fuel pumps so that I can flip the harness out of the way of the intake manifold. I place all my nuts and bolt sin labeled ziplocks bags to keep this project organized.

I also disconnected the AC line mounting nut which allows it to move around so that I can access the driver side valve cover bolts. This repair will take a while, but i taking my time to avoid any more mistakes like with the oil sensor.

Hyundai may not be the best at writing service manuals, but the Genesis sedan seems to be fairly easy to disassemble with common tools. Most of the harness bolts are 10mm. The connectors are fairly easy to open. In comparison; Toyota V6 wiring harnesses are much worst to remove(or relocate) and the connectors are darn near impossible to open by hand.

Next will be the removal of the coil packs, dip stick tube, and maybe the upper intake manifold.

52251780374_341c74c954_k.jpg


Make sure to bag and label your fasteners. it make reassembly much easier.
52251796114_d69ba36c05_k.jpg
 
Last edited:
I got the wiring harness and rear engine shield removed(mostly). I still have to disconnect the coil packs and fuel pumps so that I can flip the harness out of the way of the intake manifold. I place all my nuts and bolt sin labeled ziplocks bags to keep this project organized.

I also disconnected the AC line mounting nut which allows it to move around so that I can access the driver side valve cover bolts. This repair will take a while, but i taking my time to avoid any more mistakes like with the oil sensor.

Hyundai may not be the best at writing service manuals, but the Genesis sedan seems to be fairly easy to disassemble with common tools. Most of the harness bolts are 10mm. The connectors are fairly easy to open. In comparison; Toyota V6 wiring harnesses are much worst to remove(or relocate) and the connectors are darn near impossible to open by hand.

Next will be the removal of the coil packs, dip stick tube, and maybe the upper intake manifold.

52251780374_341c74c954_k.jpg


Make sure to bag and label your fasteners. it make reassembly much easier.
52251796114_d69ba36c05_k.jpg
This kinda jibes with what my Indie Mechanic has said about my 5.0. Working on it is pretty straightforward, nothing weird or needlessly complex - unlike BMW, Mercedes and such....
 
This kinda jibes with what my Indie Mechanic has said about my 5.0. Working on it is pretty straightforward, nothing weird or needlessly complex - unlike BMW, Mercedes and such....
The issue with repairing most newer cars is that you really have to be careful due to everything being either soft aluminum or plastic that is unforgiven to too much force. Also newer engines has a lot of components that overlap each other which make repair work tedious.

In my opinion working on a Hyundai is like working on a GM in my opinion. I just wished the 5.0 TAU parts was as affordable as the GM parts.:)
______________________________

Help support this site so it can continue supporting you!
 
I am now understanding why my local Hyundai dealer charged my about $3500 to replace my lower timing cover. For one the job is long. Second, you will have to replace many gaskets and even the high pressure fuel lines as well. The high pressure fuel lines has one-use crush flare fittings; so when removing the high pressure fuel pumps you must replace the high pressure lines. The 5.0 TAU has two high pressure fuel pumps and two high pressure fuel pump lines. The high pressure fuel pumps has to be removed to remove the valve covers.

The good news is that the high pressure fuel lines are easy to replace on the 5.0 TAU engine, but I know that they will be expensive. I have planned to pull my high pressure pumps anyway to replace the roller cam followers that drives the pumps since they do wear out and can even damage a camshaft if the roller breaks. My advice would be for owners of high mileage 5.0 and 3.8 Genesis is that they should check(or replace) the high pressure fuel pump roller cams as well or have a mechanic do it for you.

My plan was to replace my high pressure fuel pump roller cams at 100k miles, but it moved up by 10k miles.
 
Last edited:
Yeah; the high pressure fuel hoses are pricey. However, it is the price of keeping an high mileage car running properly.

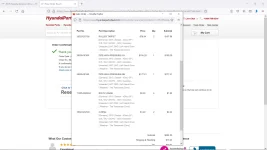
Here is the total for just the high pressure fuel pump parts of this project.
1659237965920.webp
 
I decided to return the used timing cover after inspecting more closely. I am now concerned that the cause of chipped portion may have been from a drop or some impact damage. Impact damage can cause some micro-cracking in cast aluminum in places that I can not see which could get wider over time.

Plus, I am also worried that some of the threaded areas in the cover may be stripped. So I am returning and will just buy a new OEM cover. I rather do that then try to save a couple hundred dollars and even up with a leaky cracked front cover later down the road. The used cover cost $225. The new cover cost about $450-$500; so it will only set me back a couple hundred dollars to do it right.


Here is the chipped portion. It may not affect the part performance, but I feel better just putting in a new cover.
52253453809_6ad87b3125_k.jpg
 
Well it cost me $500 for a new timing cover, but I went with the updated part number used on the 5.0 TAU engines from 2014-2020. Hopefully the updated part is an upgrade to the original.

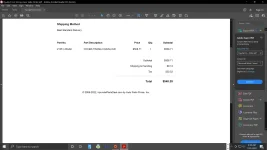
It look like it will cost me about $1500-$2000 to repair my car myself including some additional work like new sparks plugs and fuel pump rollers. The Hyundai service department was only going to do the lower timing cover for $3500.
1659264799650.webp
 
The passenger side valve cover ready is for removal after disconnecting some sensors. However, the driver side have the most crap in front of valve cover. I will look into renting a refrigerant recovery machine to drain the AC system to move the AC line out of the way. The AC line connector is easy to get to on the fire wall. I could move the AC lines a bit so it may be enough access to remove and install the valve cover, but the space is tight. Removing the AC line from the fire wall and bending it out of the way would make the job very easy.

Passenger side valve cover; basically ready to be pulled off. I only have to remove the high pressure fuel pump and the ignition coil packs.
52252422552_187ff5ed1e_k.jpg


The driver side valve cover has a few things in the way that are easy to remove like the oil dip stick tube, wiring harnesses and some vacuum hoses. The only main obstacle is the AC line; which make pulling the valve cover and installing it a challenge. It would be best to just properly move it out of the way.
52253890265_39a31afde3_k.jpg
 
Yeah, looks like that AC line would give you nothing but headaches (hand aches?) where it’s at right now.
Hope the rest of the job goes well, and boy-howdy, am I glad I don’t have a direct-injected motor! That whole replace-the-fuel-lines thing got expensive real quick. They could’ve designed some other way of assembling those so you just replace a couple seals, I bet. Ridiculous.
 
The passenger side valve cover ready is for removal after disconnecting some sensors. However, the driver side have the most crap in front of valve cover. I will look into renting a refrigerant recovery machine to drain the AC system to move the AC line out of the way. The AC line connector is easy to get to on the fire wall. I could move the AC lines a bit so it may be enough access to remove and install the valve cover, but the space is tight. Removing the AC line from the fire wall and bending it out of the way would make the job very easy.

Passenger side valve cover; basically ready to be pulled off. I only have to remove the high pressure fuel pump and the ignition coil packs.
52252422552_187ff5ed1e_k.jpg


The driver side valve cover has a few things in the way that are easy to remove like the oil dip stick tube, wiring harnesses and some vacuum hoses. The only main obstacle is the AC line; which make pulling the valve cover and installing it a challenge. It would be best to just properly move it out of the way.
52253890265_39a31afde3_k.jpg
Not sure if you intend to remove the intake manifold, but if you do - it would probably be worth replacing the "O" rings for the trans warmer coolant pipe. It's a PITA for replacing a literally .50 cent part.
 
Not sure if you intend to remove the intake manifold, but if you do - it would probably be worth replacing the "O" rings for the trans warmer coolant pipe. It's a PITA for replacing a literally .50 cent part.
Good call.

Yes, the upper intake manifold does have to removed to access a bolt on the lower timing cover.

I have already bought some newer cooler pipe o-rings about a year ago and some new intake manifold gaskets; because I read that the coolant pipe(in the engine valley) o-rings leak in our engines. I was waiting until I pulled the intake manifolds(upper and lower) to clean my valve stems at 100k miles.

The new intake manifold gaskets and new coolant pipe o-rings in a zip-lock bag.
52255123243_49d97fb989_k.jpg
 
Last edited:
I decided to just buy a refrigerant recovery machine and rent a vacuum pump. I have been putting it off because I usually just trade in a car when it reaches about 100k mile before needing to perform any major engine work. Most newer cars require that the AC lines be removed to access any major part of the engine. Hence why I just traded them in when it was about time for a front cover leak to start happening.

Well, I did the math. Keep paying about $800-900 a month on replacement cars to keep avoiding major engine repairs or just use my automotive repair skills and pay the one time cost for the proper tools to just do it myself. I decided to just buy the proper tools to keep my cars running.

So I will just properly remove the AC line on the Genesis to remove the drive side valve cover.
 
I am impressed with your grit and determination to see this thing through as a DIY project. Enjoy following it. Like many (most?) DIY projects unexpected issues arise. Also like many a DIY project, probably not much of a time or money saver in the end after factoring in the opporrunity cost of your time, yet a nice payoff in the satisfaction of a DIY job + you know its done Right!
 
Back
Top