• Car enthusiast? Join us on Cars Connected! iOS | Android | Desktop
  • Hint: Use a descriptive title for your new message
    If you're looking for help and want to draw people in who can assist you, use a descriptive subject title when posting your message. In other words, "I need help with my car" could be about anything and can easily be overlooked by people who can help. However, "I need help with my transmission" will draw interest from people who can help with a transmission specific issue. Be as descriptive as you can. Please also post in the appropriate forum. The "Lounge" is for introducing yourself. If you need help with your G70, please post in the G70 section - and so on... This message can be closed by clicking the X in the top right corner.

Illuminated Door Sill Plates - 3.8 HTRAC Ultimate

Did you find the instructions useful? I want to find out if I wasted my time scanning them all. I am going to install my wiring next week with some help from guys who tear cars apart for a living.


This info is very helpful. Where you able to install them? I'm an IT Manager, I just love working on cars :)
 
This info is very helpful. Where you able to install them? I'm an IT Manager, I just love working on cars :)

Thank you for the feedback, I am glad that scanning and posting was not a waste of my time. I have everything installed, but I think that I missed making a solid connection to one or both of the wires under the dash as the LEDs do not light up yet. After getting some help with disassembling the dash, I took over the rest of the installation myself. The part that I didn't realize is that crawling around and working under the dash is a young man's (or yogi's) game lol. It was a lot more difficult to contort and work on it than I realized. Color pictures in the instructions would be nice as well, there were a few illustrations about where to run the conduit under the dash that I really could not figure out exactly what they meant. I am not worried about it, there was plenty of room under there. Because I literally sprained a floating rib doing this, I am currently on the DL and will have to wait a bit to troubleshoot the power issue, but it shouldn't be too hard with a meter.

Did you get yours installed?

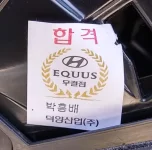
I found this sticker inside the dash, kind of interesting...
Equus sticker.webp
 
Thank you for the feedback, I am glad that scanning and posting was not a waste of my time. I have everything installed, but I think that I missed making a solid connection to one or both of the wires under the dash as the LEDs do not light up yet. After getting some help with disassembling the dash, I took over the rest of the installation myself. The part that I didn't realize is that crawling around and working under the dash is a young man's (or yogi's) game lol. It was a lot more difficult to contort and work on it than I realized. Color pictures in the instructions would be nice as well, there were a few illustrations about where to run the conduit under the dash that I really could not figure out exactly what they meant. I am not worried about it, there was plenty of room under there. Because I literally sprained a floating rib doing this, I am currently on the DL and will have to wait a bit to troubleshoot the power issue, but it shouldn't be too hard with a meter.

Did you get yours installed?

I found this sticker inside the dash, kind of interesting...
View attachment 5594

I probably won't get mine installed until middle of next week. I'm hoping to install the new ignition and my freshly rebuilt carburetor on my Camaro. After I get that car running for the season, I will work on this.

The power issue could be the cables where you tap them are backwards. Since the sills are LED the will only turn on if the right polarity is applied.

Thanx for the reminder, I triple checked that the connections were correct when I did it at the time, but will make sure once I crawl up in there again in the near future.
 
I THINK it's working right, but hard to tell. The door sill is pretty well covered by the door when it's closed so it's hard to see if the light goes off ;).

I suddenly have a mental picture of you standing in front of your refrigerator, slowly opening and closing the door... :-)
 
I probably won't get mine installed until middle of next week. I'm hoping to install the new ignition and my freshly rebuilt carburetor on my Camaro. After I get that car running for the season, I will work on this.

The power issue could be the cables where you tap them are backwards. Since the sills are LED the will only turn on if the right polarity is applied.

Did you ever get yours installed? With all of the contortions and crawling around I did almost 4 months ago I literally bruised or cracked a rib so I could not get back into it right away. I finally revisited today and you were exactly right, the polarity was backwards on the wires, even though I verified AGAIN that I wired it up as specified in the instructions. Nonetheless, I clipped and rewired one of the harnesses in each door and I am now in business! Can't wait for it to get dark so I can admire my work lol.
 
Weeeeeeeellllllll... I I got it installed, and it wasn't pretty.

78AF6407-EC15-4155-8ACD-08E7805A64B1.jpg

I must admit I am extremely disappointed at how dim they are, the headliner lights basically drowns the door sills out completely, can't even really tell that they have LEDs in them. They do look nicer in the daylight however, the GENESIS has a "jeweled" look instead of just stamped in the aluminum. I am going to check how bright they are on a V8 the next time I go to the dealership.
 
That's a real shame because the lighted sill plates on the first gen sedan are really nice. The installation is plug and play (quick) and a real no-brainer.
 
Did you ever get yours installed? With all of the contortions and crawling around I did almost 4 months ago I literally bruised or cracked a rib so I could not get back into it right away. I finally revisited today and you were exactly right, the polarity was backwards on the wires, even though I verified AGAIN that I wired it up as specified in the instructions. Nonetheless, I clipped and rewired one of the harnesses in each door and I am now in business! Can't wait for it to get dark so I can admire my work lol.

They are still sitting in a box in my garage. I have been working crazy hours at work trying to get this automation project complete. I washed my car over the weekend and I was looking at the box sitting there and I told my self I have to install them before it starts snowing again. I'm glad yours are working.
 
Looking to update and upgrade your Genesis luxury sport automobile? Look no further than right here in our own forum store - where orders are shipped immediately!
It's really interesting how differently the U.S. and Canadian models are equipped. I have the 3.8 AWD Tech model here in Canada. It comes standard with the illuminated sill plates and LED fog lights for example.
 
Installed my door sills yesterday. Almost thought they weren't working because like others have stated, you can't see them lit except in the dark. I followed the instructions which can be difficult identifying areas when they show only a drawing instead of pictures. The only thing I couldn't figure out was removing the hood release handle. I broke the grommet holding it in place and ordered another one for less than a dollar. The wiring with the installation kit is just long enough to reach. For $65 from Korea and a free installation kit from my dealer (part of the original negotiation when I purchased my car), it was worth it. I took pics:

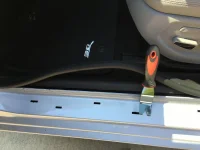
IMG_1227.webp Door sills come out easy by pulling upward. Some of the metal spring tabs might still remain in the tab slot. They come out easily with pliers and slip back onto the sill tabs.

1IMG_1228.webp 3IMG_1266.webp

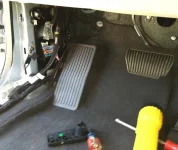
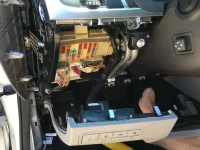
4IMG_1267.webp Excuse my foot. All electrical connectors unplug easily.

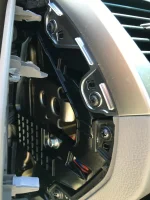
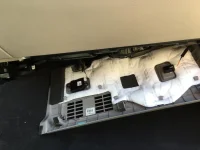
5IMG_1269.webp Under the glove back panel has 3 tabs that release easy by pressing them.

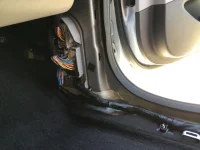
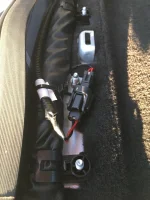
6IMG_1265.webp BCM where you make electrical connections behind passenger kick panel. Kick panels just pull away. Yellow/black to black (-), and Green/Orange to red (positive). Easy to locate but have somebody hold a flashlight to see.
 
Last edited:
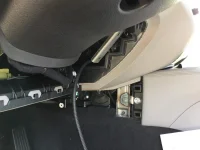
Running the wiring harness across the car is easy but again, sometimes I wasn't sure exactly where the instructions called for foam tape, zip tie and general placement based on looking at a sketched drawing instead of actual pictures. I didn't tighten up any zip ties until after I made the connections to the sills.

You can easily push the harness across the center console since it's stiff enough...

7IMG_1270.webp

Connecting the harness to the sills is straight forward.

8IMG_1271.webp

The new sill snap in place. The ribbon wire has adhesive to secure it in place and there's a slight recess in the metal lip of the car to run the ribbon over it. The harness has a plastic plate with a hole that slides over a bolt protruding from the car and under the main harness of the car.

8IMG_1271.webp

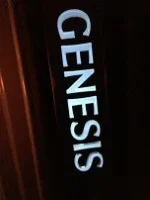
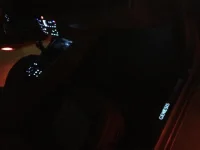
After connecting the sill wires to the BCM, the Genesis logo will illuminate in blue. However, you cannot tell this under any lighting. It HAS to be dark to see this. But they do look great at night.

9IMG_1275.webp 10IMG_1276.webp
 
If anyone has removed and re-installed the hood latch handle, can you please tell me how you did it?
 
very cool, thanks for the pics. At $65 for the plates plus whatever the harness is this is a no-brainer. I'm going to definitely do this if I decide to keep my car when the lease gets closer to the end.

Do you have the grey or ivory interior?
 
Looks like what I did as well. I bought the sill plates from eBay and the installation wiring from the Hyundai dealer, $75 each. They sill plates are not the brightest, my meter says it is about 8 volts instead of the normal 12, but they also look better in the daylight with the beveled word "GENESIS". The hardest part is getting a decent connection up under the dash for the wiring connectors.
 
It's really a shame that installation is so troublesome on the gen 2 models. It took me less than half on hour on my gen1. Pull up the old sills; plug in the new lighted ones. Shame on you Hyundai.
 
Great job, Chris41! Looks really good and thank you for the steps you took/pics. I'm taking this direction to wire my footwell lights into the dome lighting at the bcm. Seems so simple
 
So I tapped into the same wires that are controlled by the bcm for the footwells, and noticed the lights are dimmer than how I previously installed them (using a seperate ground and add-a-fuse at the fusebox). So, this would make sense why your door sills are dimmer than you like.

So I can have my footwell leds extremely bright or slightly dimmer and be controlled by the bcm, hence auto-dimming.

Just fyi. You win some, you lose some.
 
Back
Top