maxsilver
Registered Member
- Joined
- Apr 3, 2019
- Messages
- 335
- Reaction score
- 294
- Points
- 63
- Genesis Model Type
- Genesis G70
Nice results for $95 for sure. I thought about this setup as well, my concern is that most of the air flowing into the filters would be warm engine bay air given the placement of the filters with regards to the stock intake ducts, especially given how the filters are reversed compared to the intake ducts. Maybe it's not an issue as you mention there is quite a bit of space underneath the filters though. At least one of the Stinger forum guys was measuring intake air temps with a JB4, it would be super interesting to see how these DIY intakes affect air temps.So, I installed the Build-Your-Own Intakes today. I have to say, I'm super impressed. I did mine slightly differently, but others on the Stinger forum have done the same with great results. After this install, I went for a quick drive and saw no error codes or other abnormal behavior. You could definitely hear the air induction better and for the first time, I actually heard the blow off valves in operation. That was kinda underwhelming. The stock BOV sounds like a cat farting. But at least I can hear it now.
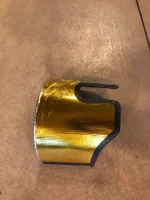
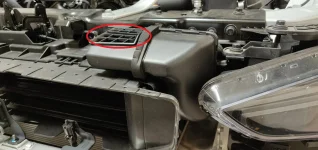
For this install, you leave in the bottom half of the stock Intake box. This provides stability for the filters and act as heat shields from the engine. The stock snorkels are intact, providing some cool air from the outside, but my biggest concern with this setup is how much hot engine bay air I will pull in. You can't see it in the pics, but there is a large amount of space between the filters and the bottom of the lower airbox. The snorkels open into this area, so the underside of the filters will get unrestricted access to the cool outside air. I'm hoping this will help offset the top of the filters getting hot engine bar air.
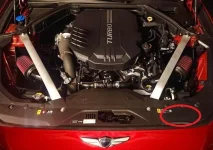
It looks and sounds great, and was super easy to install. Simply:
1) Remove the brace bars
2) Pop the top half of the airbox off using the 4 clips.
3) Unscrew the clamp holding the hose to that top half of the airbox.
4) Remove the top half of the airbox and the stock filter.
5) Position and insert the new filter 90 elbow into the stock airbox hose and re-tighten the clamp.
6) No extra bracing, tape or anything else needed. It all fits snugly, doesn't wiggle, and is held in place by the cross brace bar.
7) Enjoy.
The filters and elbows cost about $95cad.
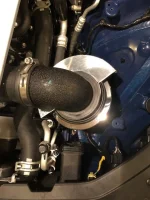
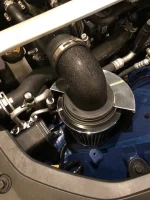
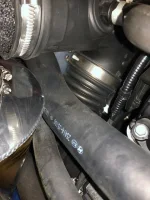
Here's some pics:
View attachment 21044View attachment 21045View attachment 21046
I'm still pondering how to build some sort of extended heat shield for my setup as suggested that doesn't look completely ghetto. For your setup I wonder if you could cut the top off of the stock airbox to create a pretty effective heat shield? That would certainly make it impossible to return to stock though if desired.