• Car enthusiast? Join us on Cars Connected! iOS | Android | Desktop
  • Hint: Use a descriptive title for your new message
    If you're looking for help and want to draw people in who can assist you, use a descriptive subject title when posting your message. In other words, "I need help with my car" could be about anything and can easily be overlooked by people who can help. However, "I need help with my transmission" will draw interest from people who can help with a transmission specific issue. Be as descriptive as you can. Please also post in the appropriate forum. The "Lounge" is for introducing yourself. If you need help with your G70, please post in the G70 section - and so on... This message can be closed by clicking the X in the top right corner.

2015 Hyundai Genesis 5.0 lower front timing cover replacement

Well, I just learned some facts about torque wrenches that I did not know. The 3/8in and larger click style torque wrenches are not supposed to be used for any small fasteners that require less than 20 ft/lbs; even if the scale does go down to 10 ft/lbs. Generally, you must use a smaller 1/4in click style torque wrench for delicate fasteners that requires less than 20ft/lbs.

Digital torque wrenches are more forgiven than click style wrenches and can be very accurate even in the lower part of the scale.

I wished I watched this video before trying to use my larger 3/8in torque on my oil sensor. Yes the socket size for the oil sensor is 24mm, but the actually threads on the sensor and oil sensor port are only about 6-8mm. So I should have just used my smaller 1/4in torque wrench with a 1/4in to 1/2in adapter. Very important lesson learned.

Therefore, I cannot blame the Hyundai service manual oil sensor tightening specs for the error that caused me to crack my timing cover; it was my own fault it seem due to using the wrong sized torque wrench. Do not make my mistake; use a smaller 1/4in torque wrench for the oil sensor.
 
Last edited:
Well, I just tried to torque down the old oil sensor with my 1/4in torque wrench to 120 in/lbs and it did not click off at the point where the old sensor was mounted based on the threads count(about two exposed threads). I can hand tighten the oil sensor up to a point and then lightly torque it with my wrench until only two threads are exposed like before. However, the torque wrench did not click off at 10 ft/lbs(120 in/lbs).

I may have been correct about the Hyundai service manual incorrectly listing the oil sensor torque specs at the range of 10ft/lbs to 15 ft/lbs. It is a typo(or error) I believe. The actual torque rating is probably about 5-6 ft/lbs, however I do have to account for the thread sealing paste adding some resistance. The old oil sensor did not have any thread sealing paste on the threads anymore; so it may also be why the torque wrench did not click due to less resistance.

Either way, I will just install my new oil sensor by hand until it can not go any farther and then snug it down with a wrench until only about two threads are exposed like the old sensor. It seem pointless trying to torque the oil sensor to an exact torque specification.
 
Update: Hyundai decided to use the cheapest way to install an oil sensor by going with a very small diameter tapered NPT style fitting. To make matters worst the fitting is located on a cast aluminum port that is not that strong. There is no way to crank down on the oil sensor for 10ft/lbs to 15 ft/lbs as described in the service manual without cracking the port. The oil sensor tapered NPT fitting needs to be first hand tighten and then turned half a turn or maybe to a full turn to seat properly in the tamper.

My advice would be to hand tighten the sensor as snug as you can and then I would just use the old oil sensor (exposed threads)as an guide to how tight to snug down the new oil sensor. Ignore the service manual torque specs.

I reviewed a few videos on tapered NPT fitting installation and the videos all basically say hand tighten the fittings and then make a turn or two with a wrench to properly seat it in the taper, but do not over tightening it. I wished that Hyundai treated the oil sensor like a tapered NPT fitting install in the service manual.

I hope this information help any other DIY owner that will try to change their own oil pressure sensor to avoid a costly mistake like I made.
 
Last edited:
Tips for the crank pulley install.

(1) Use a new crank bolt. The crank bolt is a torque to yield bolt that stretches.

(2) Use a 3/4in drive long handle torque wrench or 3/4in long handle 40in breaker bar with a digital torque adapter to easily reach the 296 ft/lbs needed to crank it down. However, be careful with the breaker bar since you can easily over shoot the mark toward the end.

(3) Use a crank pulley installer tool with beefy pins since the Genesis crank pulley on have two holes in the face for a pulley tool to mount to. I used OTC Stinger brand pulley tool that had beefy pins that fit the Hyundai pulley holes.


My setup to reach 297 ft/lbs. I over shot by 1 ft/lbs according to the digital torque adapter. I let the pulley tool wedge itself on the frame while torque down the crank bolt to prevent the pulley from turning. The 40in long 3/4in breaker gave me plenty of leverage to get the job done.
52901761768_7a40e5d807_k.jpg

52901707210_286e6b322d_k.jpg

52900747617_4d21057cc1_k.jpg
 
I installed the new oil sensor and coolant sensor. I have to admit that I was very very careful when I tighten them down. I just tighten them down to the exposed threads like with the old sensors. If they leak then I will just snug then down a bit more until the leaking stop, but both sensors seem tight enough.

Coolant temperature sensor
52903170095_559748460f_k.jpg


Oil pressure sensor
52902938894_fb6b979c3b_k.jpg
Yeah - after all you've gone through, I'd be paranoid AF!
 
Yeah - after all you've gone through, I'd be paranoid AF!
Heck yeah I was worried that this timing cover may crack as well!!!!!

However, I had to install new sensors so I went for it and so far so good.
 
Heck yeah I was worried that this timing cover may crack as well!!!!!

However, I had to install new sensors so I went for it and so far so good.
You're doing it right though... Slow & methodical. Helps that you have a backup ride.
 
Looking to update and upgrade your Genesis luxury sport automobile? Look no further than right here in our own forum store - where orders are shipped immediately!
You're doing it right though... Slow & methodical. Helps that you have a backup ride.
Correct, I am in no rush to get it done. A mistake made in haste can set me back or cause extreme damage to the engine and transmission.

Now, I am pretty much just putting the parts back on the engine and chassis. The hardest and most dangerous parts of the job is over.

I am just taking my time and making sure that I do not over-tighten any of the parts since I am not sure about how strong the aluminum casting is for this engine. It seems to not be the best quality of casting I have worked with due to how easily the oil sensor port cracked.

Note: A lot of the time needed on this repair is also due to waiting for OEM parts like seals and gaskets to arrive by mail. I just now received my water pump gasket and coolant pipe o-rings for the coolant pipes in the engine valley that I ordered 3 weeks ago.

The same happened with the new OEM oil and coolant sensors.
 
Last edited:
Correct, I am in no rush to get it done. A mistake made in haste can set me back or cause extreme damage to the engine and transmission.

Now, I am pretty much just putting the parts back on the engine and chassis. The hardest and most dangerous parts of the job is over.

I am just taking my time and making sure that I do not over-tighten any of the parts since I am not sure about how strong the aluminum casting is for this engine. It seems to not be the best quality of casting I have worked with due to how easily the oil sensor port cracked.

Note: A lot of the time needed on this repair is also due to waiting for OEM parts like seals and gaskets to arrive by mail. I just now received my water pump gasket and coolant pipe o-rings for the coolant pipes in the engine valley that I ordered 3 weeks ago.

The same happened with the new OEM oil and coolant sensors.
Sounds like you're close - Good deal!
______________________________

Help support this site so it can continue supporting you!
 
I may have a good tip for anyone that may needs to change an thermostat on a 2015 5.0 Genesis. Even though it is not listed on the Beck Arnley website; it seems that the 2014 5.0 thermostat housing unit they sell may fit an 2015 5.0 model. The units appear to be the same size and configuration. The only other thermostat option I found was OEM for the 2015 and newer 5.0 models that cost about $160 dollars. The Beck Arnley unit cost only $60.

I am changing my old stock thermostat because I believe that it may be stuck open(or not closing properly) since my engine takes forever to warm up even when driving which also affects my A/C heater performance in the winter.


The Beck Arnley states their thermostat is a 180F unit; while the stock unit is a 190F thermostat. I am not sure if the cooler running thermostat will be a problem on my Genesis. I will try it out and see. I doubt that 10F will make that much of difference since my engine was running cooler than it should for while without throwing a code.

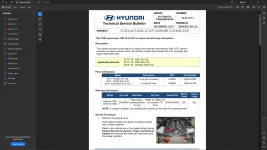
The Beck Arnley thermostat unit on the left and the stock thermostat unit on the right. I am also changing out my engine valley coolant pipe red o-ring for the newer blue o-ring as per the TSB for the coolant pipe.
52916892934_2ce9c22ff1_k.jpg
 
Last edited:
I may have a good tip for anyone that may needs to change an thermostat on a 2015 5.0 Genesis. Even though it is not listed on the Beck Arnley website; it seems that the 2014 5.0 thermostat housing unit they sell may fit an 2015 5.0 model. The units appear to be the same size and configuration. The only other thermostat option I found was OEM for the 2015 and newer 5.0 models that cost about $160 dollars. The Beck Arnley unit cost only $60.

I am changing my old stock thermostat because I believe that it may be stuck open(or not closing properly) since my engine takes forever to warm up even when driving which also affects my A/C heater performance in the winter.


The Beck Arnley states their thermostat is a 180F unit; while the stock unit is a 190F thermostat. I am not sure if the cooler running thermostat will be a problem on my Genesis. I will try it out and see. I doubt that 10F will make that much of difference since my engine was running cooler than it should for while without throwing a code.

The Beck Arnley thermostat unit on the left and the stock thermostat unit on the right. I am also changing out my engine valley coolant pipe red o-ring for the newer blue o-ring as per the TSB for the coolant pipe.
52916892934_2ce9c22ff1_k.jpg
My 5.0 takes it's sweet time to provide heat in winter as well... it'll deign to puff out warmish air in about 10 mins, By comparison, the wife's Soul is ready to Air Fry a whole chicken before you go 3 blocks!

I had my coolant pipe done a couple of years ago. Didn't even realize it was leaking until my mech noticed the undertray was a little damp with antifreeze - My o-ring didn't even look that bad....
Exactly how my 5.0 heater treats me.:)

The A/C does not start to warm up until about 10-15 minutes of driving; an then it is mostly just warm air at first. The engine temperature gauge stays very cool for miles of driving before it hit the midway mark in the winter. In the summer the engine warms up much faster, but still takes a while compared to my other cars.

I did have a thermostat change on my to do list, but the stock unit costed $160 so I just put it off until the engine light come on. Now is the perfect time to take care of it.

The new blue coolant o-ring for the coolant pipe is a fatter round shape, the older red o-ring is a thinner flatter o-ring. I assume that the new blue o-ring creates a better seal hence the TSB update. The other coolant pipe black o-ring is also round and does not need to be updated(same part number); only the red flat o-ring in the junction end.
 
Last edited:
Exactly how my 5.0 heater treats me.:)

The A/C does not start to warm up until about 10-15 minutes of driving; an then it is mostly just warm air at first. The engine temperature gauge stays very cool for miles of driving before it hit the midway mark in the winter. In the summer the engine warms up much faster, but still takes a while compared to my other cars.

I did have a thermostat change on my to do list, but the stock unit costed $160 so I just put it off until the engine light come on. Now is the perfect time to take care of it.

The new blue coolant o-ring for the coolant pipe is a fatter round shape, the older red o-ring is a thinner flatter o-ring. I assume that the new blue o-ring creates a better seal hence the TSB update. The other coolant pipe black o-ring is also round and does not need to be updated(same part number); only the red flat o-ring in the junction end.

Just wondering, do you or anyone else here know if that coolant pipe is also in the 4.6 engine? And if so, would it also need the new O ring?
 
Just wondering, do you or anyone else here know if that coolant pipe is also in the 4.6 engine? And if so, would it also need the new O ring?
It looks like TSB I read only mentions the 5.0 engine ; not the 4.6. So your 4.6 may not have an issue with the o-ring or an even have ATF warmer at all.
1685228819334.png
 
Last edited:
I finished up installing the coolant related parts on the front cover except the pulley adapter on the water pump since I may need more room to install some other parts in the area.
52965372929_27d8c071b2_k.jpg


Here is how I bypassed the coolant hose going into the throttle body since I do not need a throttle body warmer in my area. My Genesis IAT sensor temps were much cooler with this mod.
52965233481_281a466b8d_k.jpg
 
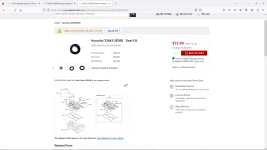
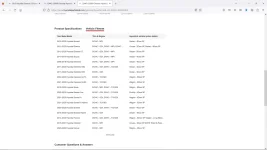
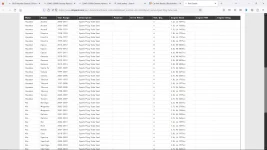
I have found that Beck Arnley does make parts that fit my 2015 5.0 engine, however they are listed for other Hyundai models and early pre-2015 5.0 Genesis/Equus. The good news is that it seems Hyundai uses the same part(like spark plug seals) for different 5.0 models.

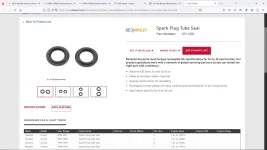
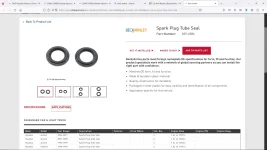
I ordered some spark plugs seals from Beck Arnley that cost $11 a pair on Amazon that is supposed to fit the 2013 Hyundai Genesis 5.0 valve covers. The same parts numbers for those cross reference to the OEM spark plug seals for the 2015 Genesis 5.0. Hyundai charges 15.99 for each spark plug seal, which is more that twice the cost for (8) spark plug tube seals compared to the Beck Arnley twin pack for $11.

So it seems that 5.0 engine may not be that bad to maintain and repair if companies like Beck and Arnley make replacements that will work on the engine. The problem is that the companies do not specially list the 2015 Genesis 5.0 as a compatible model on their website, so you have to look up part OEM numbers and see if the are used on other Hyundai 5.0 models. I will post if the Beck Arnley spark plug seals fit my 2015 Genesis valve covers.

The OEM plug seals.

1688875644172.webp

1688875664446.webp

Beck Arnley plug seals.

1688875863159.webp
1688875907014.webp
 

Attachments

  • 1688875887264.webp
    1688875887264.webp
    70.5 KB · Views: 0
Good news. The Beck Arnley spark plug seals fit the 2015 5.0 valve covers; so they are a good affordable replacement option over the OEM spark plug seals. I changed my spark plug seals due to how hard it is to remove the driver side valve cover(have to remove AC lines) and spark plug seals tend leak if your pull the valve cover and then try to reuse them since the rubber spark plug seal usually gets damaged.

I was a little concerned about pulling the spark plug tube seals out of the plastic valve covers on the 5.0 engine, but the spark plug seals did come out easy from the plastic valve covers with a seal puller due to having no corrosion bond like on aluminum valve covers.

Beck Arnley spark plug tube seals are the same size and fit perfectly.
53033340979_7d498c2623_k.jpg


The new Beck Arnley spark plug seal on the left(dry) and the old OEM seal on the right(oily).
53033565810_67a05ec64e_k.jpg


The new Beck Arnley spark plug seal installed in the valve cover. Perfect fit.
53032594942_237c9ddca1_k.jpg
 
Last edited:
I installed the side passenger side valve cover and the new Beck Arnley spark plug tube seals fits around the spark plug tubes perfectly snug with no issue. However, I was a little concerned about the actually fitment on the spark plug tubes when installing the valve covers since the new tube seals have a slightly smaller inner diameter compared to the old seals.

Passenger side valve cover done, next the driver side valve cover and then the spark plugs and AC compressor.
53044493962_00581da3e9_k.jpg
 
Back
Top