• Car enthusiast? Join us on Cars Connected! iOS | Android | Desktop
  • Hint: Use a descriptive title for your new message
    If you're looking for help and want to draw people in who can assist you, use a descriptive subject title when posting your message. In other words, "I need help with my car" could be about anything and can easily be overlooked by people who can help. However, "I need help with my transmission" will draw interest from people who can help with a transmission specific issue. Be as descriptive as you can. Please also post in the appropriate forum. The "Lounge" is for introducing yourself. If you need help with your G70, please post in the G70 section - and so on... This message can be closed by clicking the X in the top right corner.

TUTORIAL: 2015 Genesis trunklid KDM "Wings" Emblem installation

Great News - I just received my "1 x 2012 - 2014 Genesis Sedan *NEW* 15+ Wing Badge Emblem Logo Hood/Trunk
(Option: REAR/TRUNK LID) " from Korean Auto Imports and the alignment pegs are gone! In there place just the 3M adhesive tape...ready to align and stick on. Therefore, no cutting or grinding and these wings are big compared to my 2010 add on wings...very happy. Didn't look forward to going thru the trimming process.
what size is the badge wing tip to tip?
 
Looking to update and upgrade your Genesis luxury sport automobile? Look no further than right here in our own forum store - where orders are shipped immediately!
STEP 7:

Next use some isopropyl alcohol applied to a shop rag to wipe off the Goo Gone or WD40 film.

IMG_2928.jpg


-------------------------------------------------------------

STEP 8:


Now using two strips of blue painters tape on the top edge, test fit your new KDM "Wings" emblem onto the trunk lid. DO NOT peel the factory adhesive backing off of the "Wings" emblem yet. This is just going to be a test fit for alignment.

IMG_2943.jpg


As long as your car is parked on a level surface to you can use a bubble/spirit level to confirm that the emblem is level with respect to the car. You can check the car by opening the trunk and placing the level on the trunk floor. If your car itself is not level then you do not use the bubble/spirit level to align the emblem. In this case, use a tape measure to align the emblem by comparing the distance from the wingtip to the lower trunk edge. You should also use the tape measure to confirm side to side positioning.

IMG_2944.jpg


-------------------------------------------------------------

STEP 9:


Once your emblem is aligned, use the painters tape to tape a perimeter around the wingtips and along the bottom edge of the emblem. You will be using these as your guide when adhering the "Wings" to the trunk. Double check with the tape measure and level after you create the perimeter in case anything has shifted.

IMG_2935.jpg


IMG_2936.jpg


-------------------------------------------------------------

STEP 10:


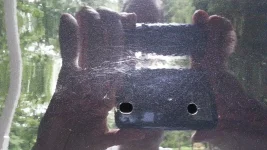
Now take the "Wings" emblem off of the trunk lid and peel off the adhesive backing taking care not to touch the adhesive with your hands as the oils in your fingers will diminish its stickiness.

Carefully apply the emblem onto the trunk using your blue tape perimeter as your guide. I started by applying the right lower edge using both the left wingtip and bottom of the crest as my guide.

Press the emblem on and hold for 20-30 seconds with gentle uniform pressure to ensure a good seal.

IMG_2938.jpg


-------------------------------------------------------------

STEP 10:

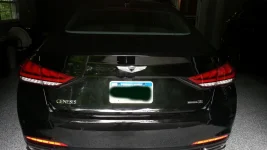
Now peel off the blue painters tape perimeter. Give the emblem and trunk lid a wipe down using the microfiber cloth and detailing spray to remove any fingerprints and you are DONE!!!


-------------------------------------------------------------

ENJOY!


IMG_2941.jpg
Excellent job! I really appreciate the time an effort in your presentation! Thanks for sharing.
 
Can anyone tell me the exact location of the wing tips? i.e. exact measurements from the bottom lip of the trunk? It seems to me there is some leeway there as long as the holes are covered but I am not sure how to ensure it is EXACTLY where it needs to be. The measurements side to side I could figure out since it would be whatever it needs to be to be exactly centered, but up and down is what I am most confused about since it really isn't in the exact center of the trunk, but more in the center of the flatter part of the trunk.

anyone able to help me out? I just need some guidance on where, vertically, to place the wings. thanks to the video, I have the courage to try this, but that's the one piece of info I am not 100% sure on. Maybe, once the old emblem is removed and I have two holes staring at me it might be obvious, but I'd feel better with some guidance.
 
anyone able to help me out? I just need some guidance on where, vertically, to place the wings. thanks to the video, I have the courage to try this, but that's the one piece of info I am not 100% sure on. Maybe, once the old emblem is removed and I have two holes staring at me it might be obvious, but I'd feel better with some guidance.

When it came to sticking mine on, I went to the dealership who removed the old H. But when it came to new ones, he didn't have any official numbers, so took a few steps back while was placing it, to give him directions on whether it 'looked' OK. So you could say, I simply winged it (he he he).
 
When it came to sticking mine on, I went to the dealership who removed the old H. But when it came to new ones, he didn't have any official numbers, so took a few steps back while was placing it, to give him directions on whether it 'looked' OK. So you could say, I simply winged it (he he he).

that may be what I end up doing.....although, will do it as I am taping it so that when it comes to actually sticking it on, I am confident it looks reasonably in the correct position. I am probably making the issue of vertical placement a bigger issue than it is, and suspect that once I dry fit it with tape, it will become obvious.
 
was told by the salesperson they charge $600.00 to put the wings on :confused:

This would be instant new salesperson or dealer for me. They're either extorting you or they know so little about the car they think it's a huge kit like it was for the previous model with a steering wheel and wheels to do as well. Either way I'd walk...
 
This would be instant new salesperson or dealer for me. They're either extorting you or they know so little about the car they think it's a huge kit like it was for the previous model with a steering wheel and wheels to do as well. Either way I'd walk...

this is after I bought the car, I told them I bought the wings online ,
but they mentioned something about the wheels
still too high
______________________________

Help support this site so it can continue supporting you!
 
this is after I bought the car, I told them I bought the wings online ,
but they mentioned something about the wheels
still too high

Even worse! They want $600 when you've already bought the part?!?! Installing with one of the many suggestions in this thread really isn't too bad. It's about a 30 min job at max as long as you have some basic tools.
 
Even worse! They want $600 when you've already bought the part?!?! Installing with one of the many suggestions in this thread really isn't too bad. It's about a 30 min job at max as long as you have some basic tools.

Agreed. Even if you have to buy a Dremel and a heat gun/hair dryer you would be spending way less. Plus you get the satisfaction of accomplishing it on your own.

Once you have the tools I listed in my tutorial it will take you much less than 30 minutes. Probably 10-15 minutes max.
 
Okay, I did it. Now, I am not a 'handy' person so despite how simple this seemed, it was still a big step for me to do it myself.

I would say it came out pretty well. I did have a bit of trouble getting the old flying H off because my fishing line was less than 20lb and kept breaking.
The other issue I had was, despite being extremely careful, I did cause some scratching - of course, keep in mind the car is black, and gets scratches just by looking at it. 95% of the ones I caused were covered up by the wings emblem.

I wasn't sure about the vertical placement and now that it is done have a feeling it may be a tad high. It is 1 1/2 inches from the bottom of the tip to the lip on the bottom of the trunk, but it appears that about 1/8 to 1/4 inch of the top of the emblem is right on the ending of the curved part of the top part of the trunk and seems to me in retrospect it could have come down a tad.

The other thing I noticed is that there is a small space around the edge of the emblem - I presume this is normal??? in other words about 1/16th of an inch of the edge of the emblem isn't making contact with the car - of course, I noticed the same thing with the flying H - as that space provided an excellent start for the fishing line.

attached is a pic of the scratches and the finished product.
 

Attachments

  • 2014-06-21 11.58.30.webp
    2014-06-21 11.58.30.webp
    61.7 KB · Views: 488
  • 2014-06-21 11.22.49.webp
    2014-06-21 11.22.49.webp
    110.2 KB · Views: 1,255
Motegi, thank you for the time and effort you put into this and also the detailed pictures; GREAT DIY post!
 
attachment.php


Holy crap! Where you trying to get it off with a screwdriver!!

Heating the original badge with a hairdryer and gently rocking back and forth with thin fishing line with a down and out motion should not have caused that??

I've debadged a phantom black (metallic pearl) Audi and there wasnt a mark on the paint.
 
I will say that it did not look as bad as the picture makes it look . The only other thing is it could have been were my finger nails when I tried to pull it off with my hand when it was not quite ready to come off. Fortunately after the new emblem is.on.and a bit of wax where the remaining visible scratch was it is barely noticeable. I also have found the black paint on both my 2012 genny and now the 2015 doesn't seem to be as durable as my wife's 2014 black Acura mdx.
 
I will say that it did not look as bad as the picture makes it look . The only other thing is it could have been were my finger nails when I tried to pull it off with my hand when it was not quite ready to come off. Fortunately after the new emblem is.on.and a bit of wax where the remaining visible scratch was it is barely noticeable. I also have found the black paint on both my 2012 genny and now the 2015 doesn't seem to be as durable as my wife's 2014 black Acura mdx.

Glad to hear it cleaned up nicely!

Funny you should mention the paint on your Acura. I have had two Nighthawk Black Pearl Acuras (an RL SH-AWD and an MDX) and find that the Acura paint is the softest of any car that I've ever owned. Even washing by hand using a two bucket method and a dirt filter and drying with a 100% cotton towel results in swirl marks. Anytime I use a clay bar, I end up with dulling and light scratches everywhere. Luckily they all polish out easily with a DA polisher and a light compound but it is a real hassle.

I'm going to wash, clay, polish, and seal the wife's Genesis tomorrow so I'll report back afterwards with the results!
 
My genesis came rebadged already by the dealer which was cool. I realized it when I got home. The car had one of those extra window stickers that dealers often put on in the showrooms for dealer installed accessories. In this case it was Appearance Package $1,495. I am pretty sure this was the only mod for the $1,500. They agreed to waive it pretty quickly.
 
My wings finally arrived after 3 weeks. Mine had pegs and the part number is identical to the pic motegi posted. I took off my posts with a drill and small wire snips. I would only recommend the drill to remove some of the "bulk". It's too easy to over shoot once you get close. I used only the snips on the oval post. I hope to get the wings on tonight.
 
Back
Top